overview
Overview:
In the process of TSMaster support, we found that engineers have a lot of record function requirements, so today we share with you the functional practice of TSMaster record module, and introduce to you what functional requirements there are before opening the article, so that you can easily check the relevant places of interest.
Index
1.1 I'm a beginner, how do I start using the TSMaster record module?
1.2 When testing, I always forget to start recording messages, how can I achieve [automatic recording] of message traces after the project starts?
1.3 I want to implement [specific messages] recorded to [different blf files] for [different channels] How to configure?
1.4 When recording for a long period of time, is the record file by [file size] or by [number of message frames]? Is it better to create a new log file or All in [Unlimited] to generate one log file?
1.5 How can a recorded blf file be quickly converted to asc file and mat file formats?
1.6 Can recorded blf files be merged or split?
Full text
1.1 I'm a beginner, how do I start using the TSMaster record module?
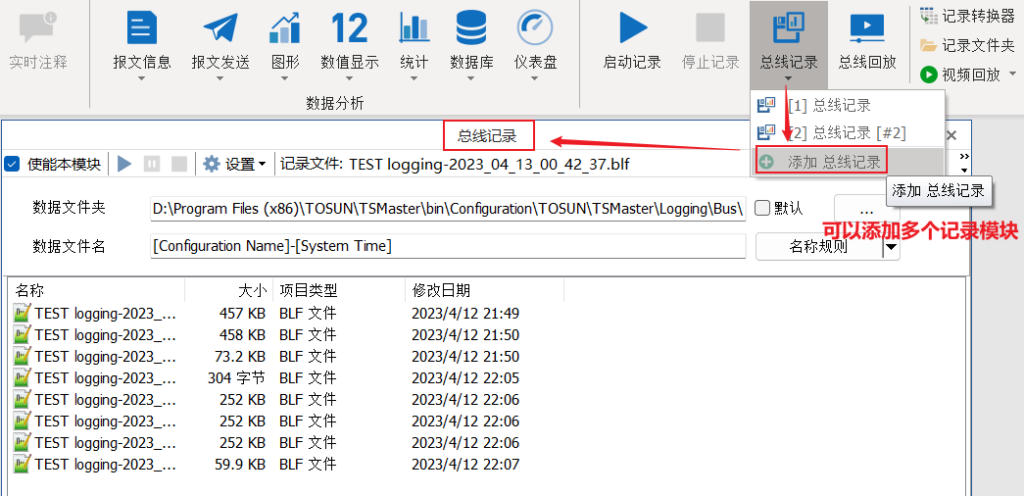
Step1: The logging module is located in the main menu [Analysis] -> [Bus Logging].

Step2: [Add Bus Record] module, you can add multiple record modules.
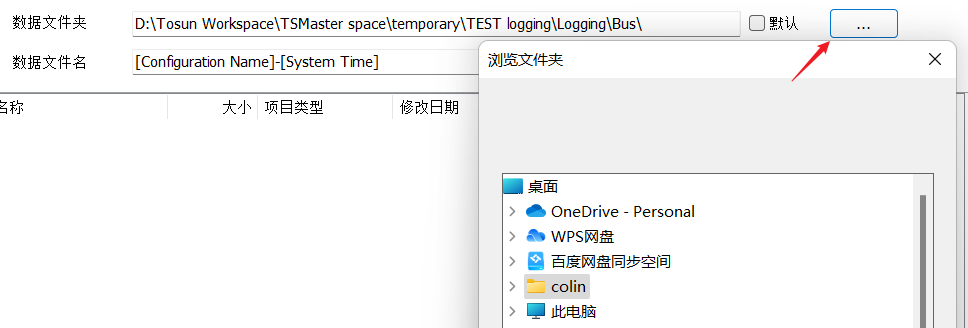
Step3: Set the record data folder path.
Case1:When "Default" is checked, the log files are saved in the default project \Logging\Bus\ folder; Case1:When "Default" is checked, the log files are saved in the default project \Logging\Bus\ folder. Bus\ folder:
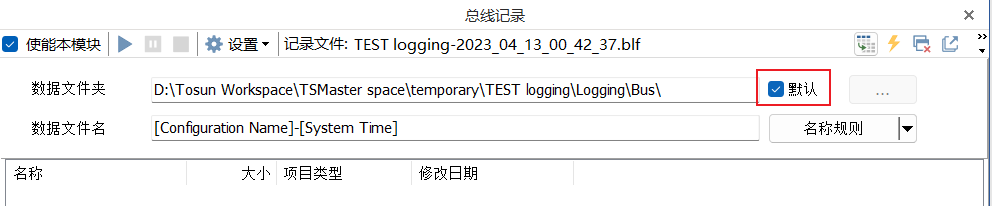
● Case2: Remove "Default", and you can click "..." to choose a custom save path:
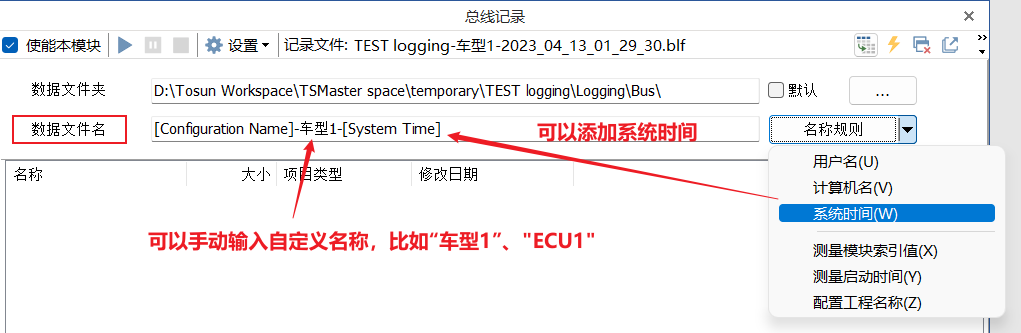
Step4: Data file name naming, you can manually enter a custom name, such as "Model 1", "ECU1", you can also add the project name, system time, user name, etc. in [Name Rules].
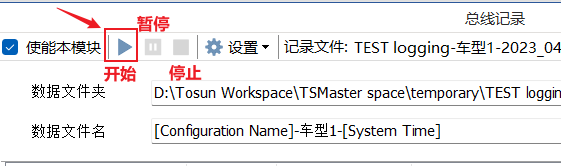
Step5: Click the Start Logging button to start logging bus messages, with pause and stop logging buttons.
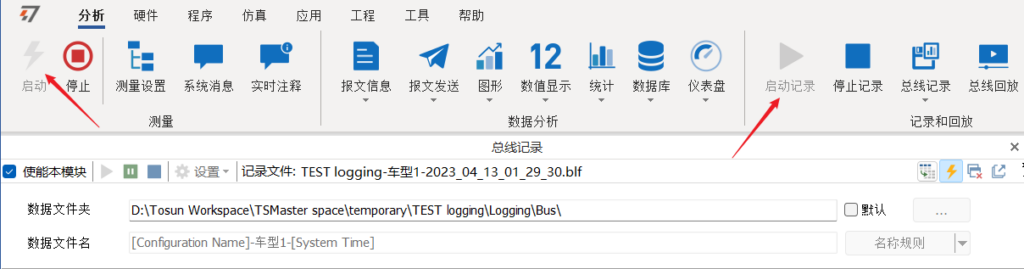
1.2 When testing, I always forget to start recording messages, how can I achieve [automatic recording] of message traces after the project starts?
● Simply click on the lightning bolt button at the top right of the bus logging module to activate the automatic start logging function.

● The bus logging function will start automatically when the project is started.
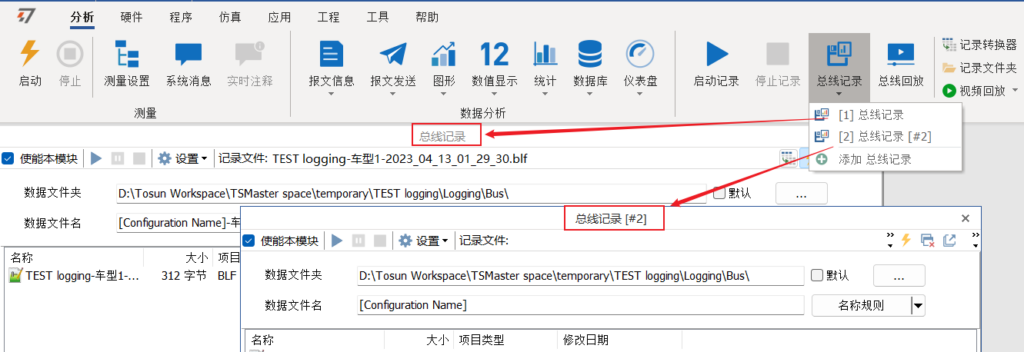
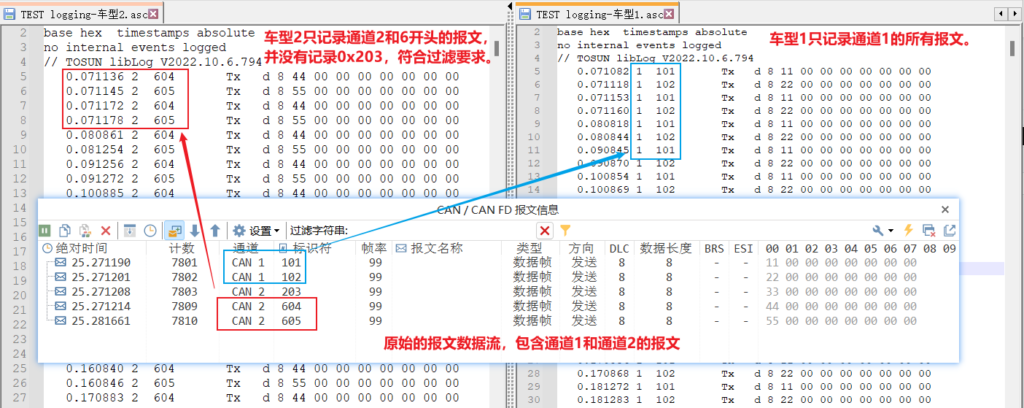
1.3 I want to implement [specific messages] recorded to [different blf files] for [different channels] How to configure?
For example: you want to record the message of channel 1 into the blf file named "model 1"; record the message of channel 2 into the blf file named "model 2", and record only the message ID starting with 6.
Step1: First create two bus record modules, "Bus Record" and "Bus Record #2", and name each record file name.
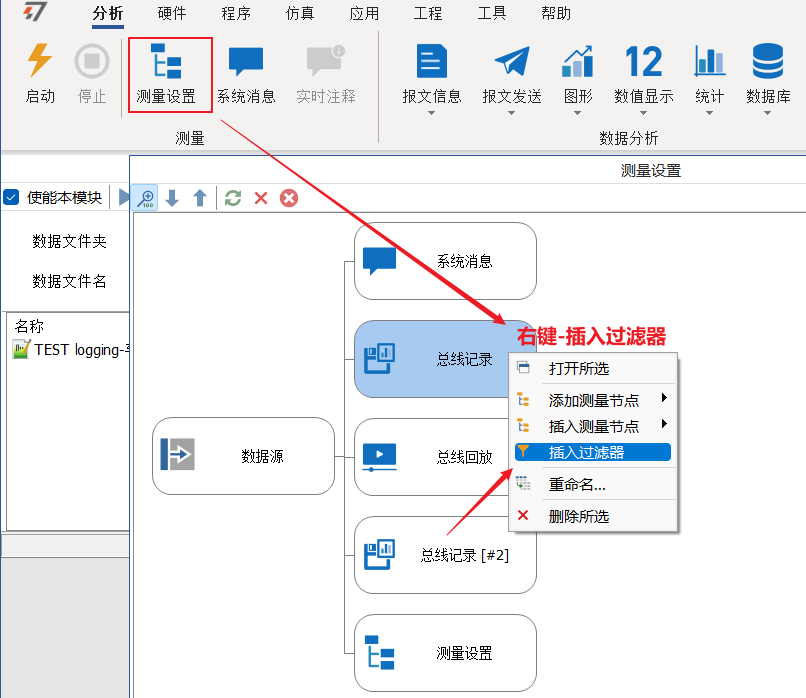
Step2: Open [Measurement Settings], select bus record and bus record #2 respectively, right click-insert filter.
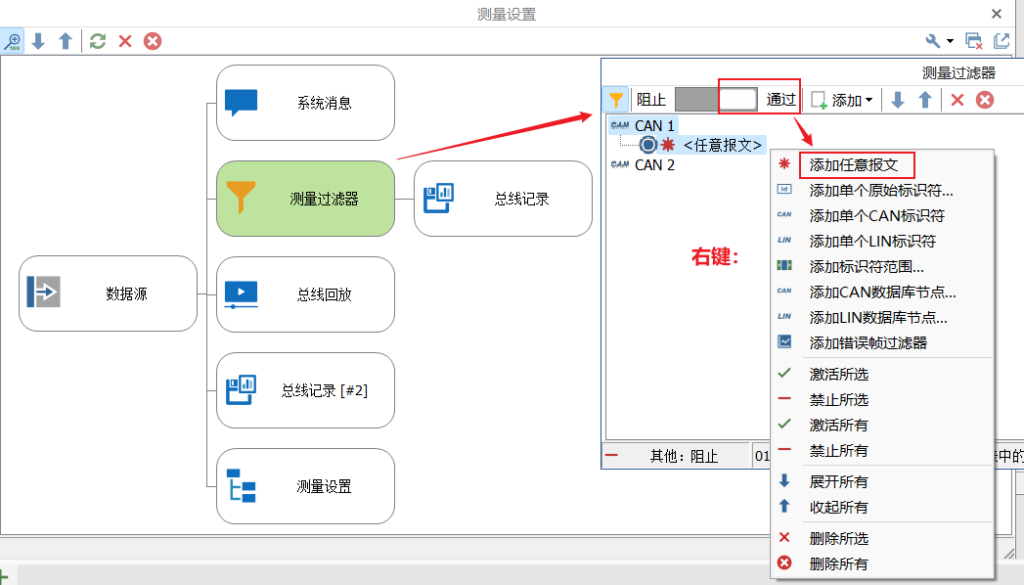
Step3: Configure the filters separately: the bus record is set to [pass] any message of CAN1.
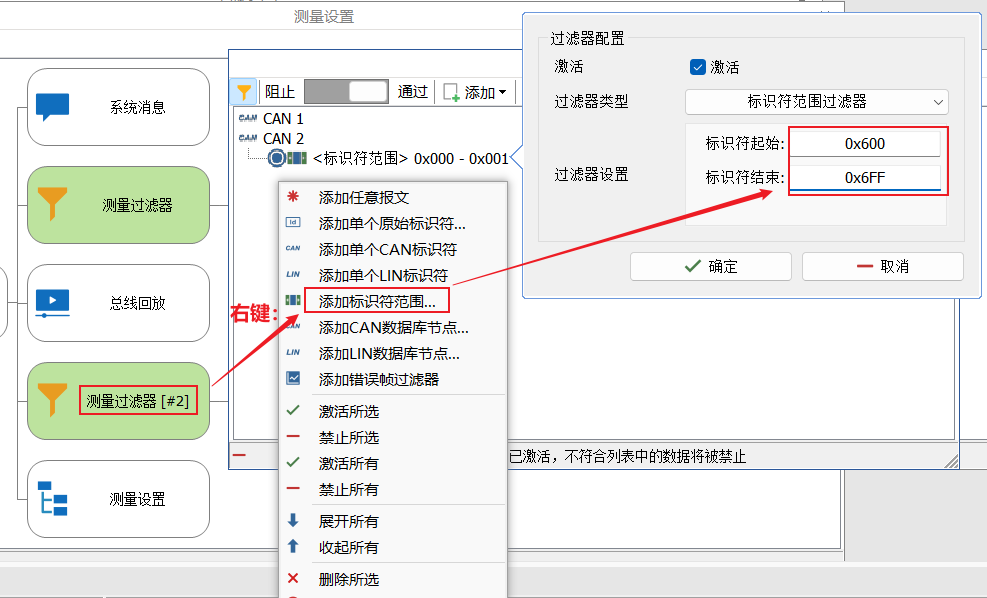
Bus record #2, set to [via] CAN2, add identifier range and filter set to identifier start: 0x600 / identifier end: 0x6FF
Recorded results validation:
1.4 When recording for a long period of time, is the record file by [file size] or by [number of message frames]? Is it better to create a new log file or All in [Unlimited] to generate one log file?
Depending on the test occasion, different log file sizes can be configured for generation.

● Unlimited: Only one record file is generated, and all messages are saved in this file.
▲ Note: It is generally not recommended to use infinite mode when recording for a long time, because recording all messages to one file for a long time will cause the record file to be too large to open or take up too much computer memory during the recording process and cause the record file to be lost.
● When the number of frames is greater than xx frames: create a new record file with the number of message entries.
For reference: a CAN standard frame with one million message count has a file size of approximately 4.5M.


● When the file size is larger than xx M bytes: create a new record file with the file size.
Reference: It is generally recommended to set about 200M a file is more suitable for post-processing, conversion of asc files easy to open files and processing.

1.5 How can a recorded blf file be quickly converted to asc file and mat file formats?
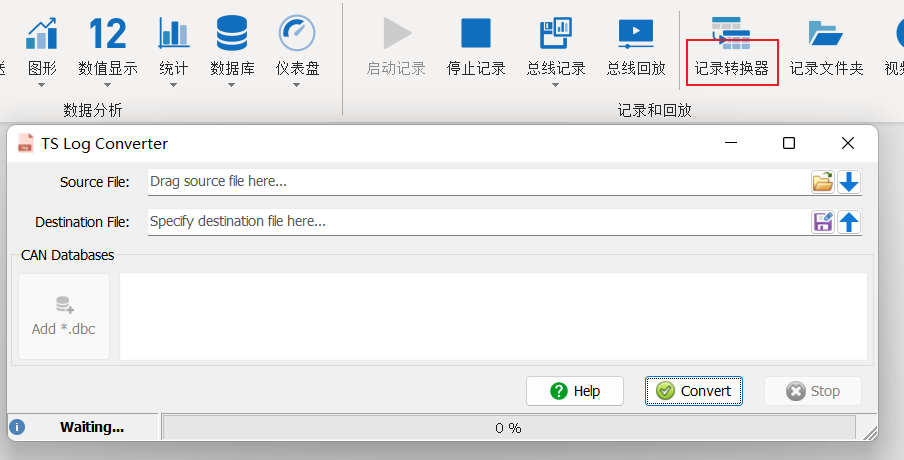
● Conversion to ASC file format:
Step1: Open [Analysis] -> [Record Converter].
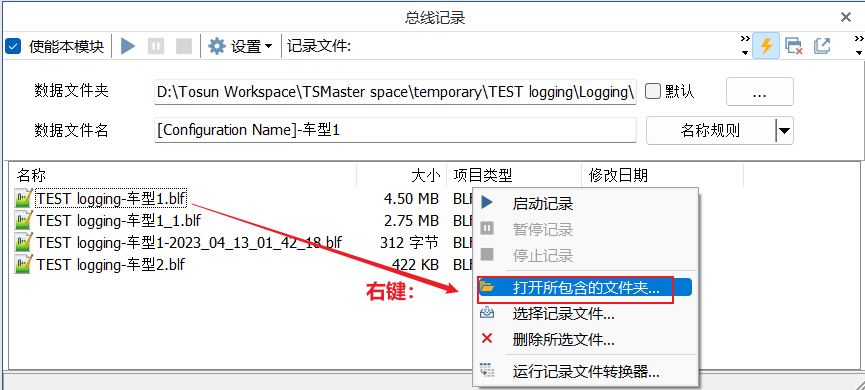
Step2: Open the folder path of the recorded blf file.
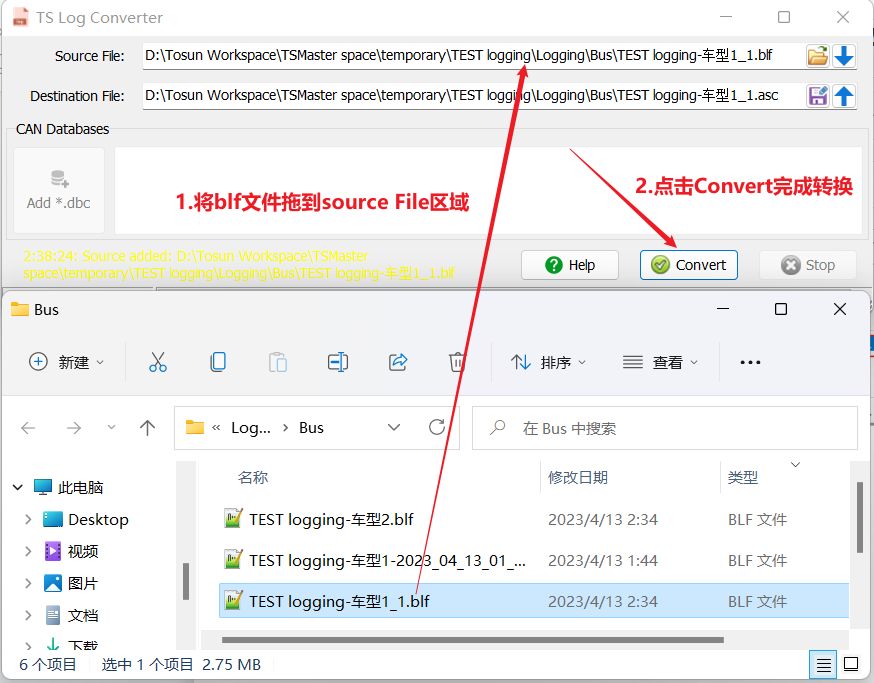
Step3: Drag the blf file to the source File area, and then click Convert to finish the conversion.
● TurnSwitch to mat file format:
Step1: Also drag the blf file to the source File area, and then select Save as mat file.
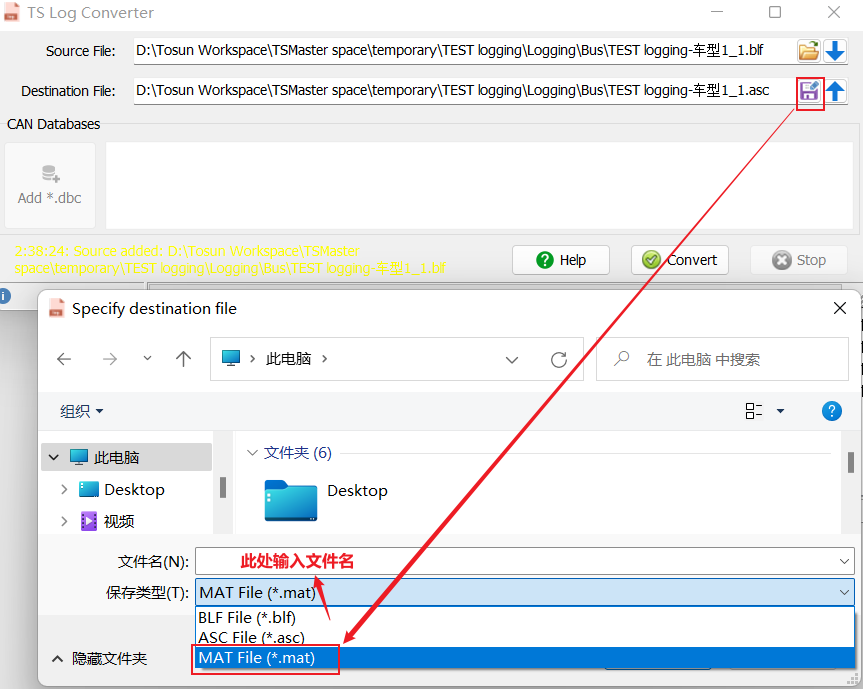
Step2: Load the DBC file related to the record message, and then click Convert to generate the mat file, and will prompt Convert done.

1.6 Can recorded blf files be merged or split?
Yes, you can use the same star Blf_Export_Data small software to merge or split blf files.
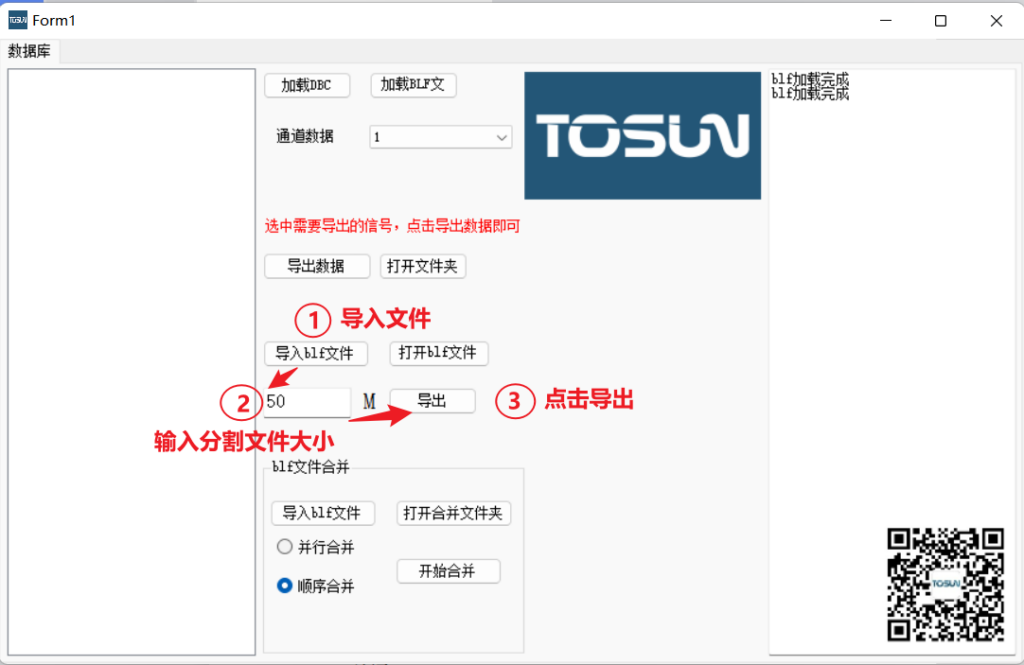
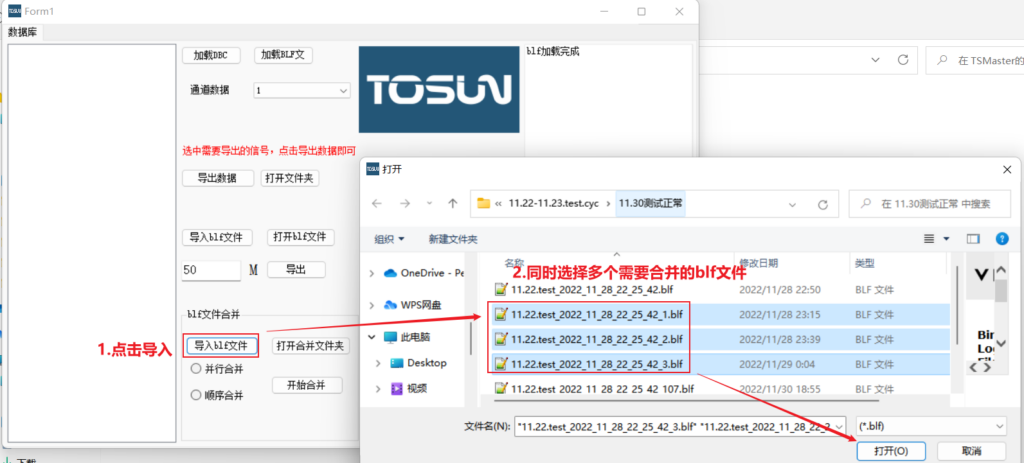
● Blf merge function operation:
1. click to import the blf file;
2. select multiple blf files to be merged at the same time;
3. You can choose to merge in parallel, or sequentially, and then start the merge.
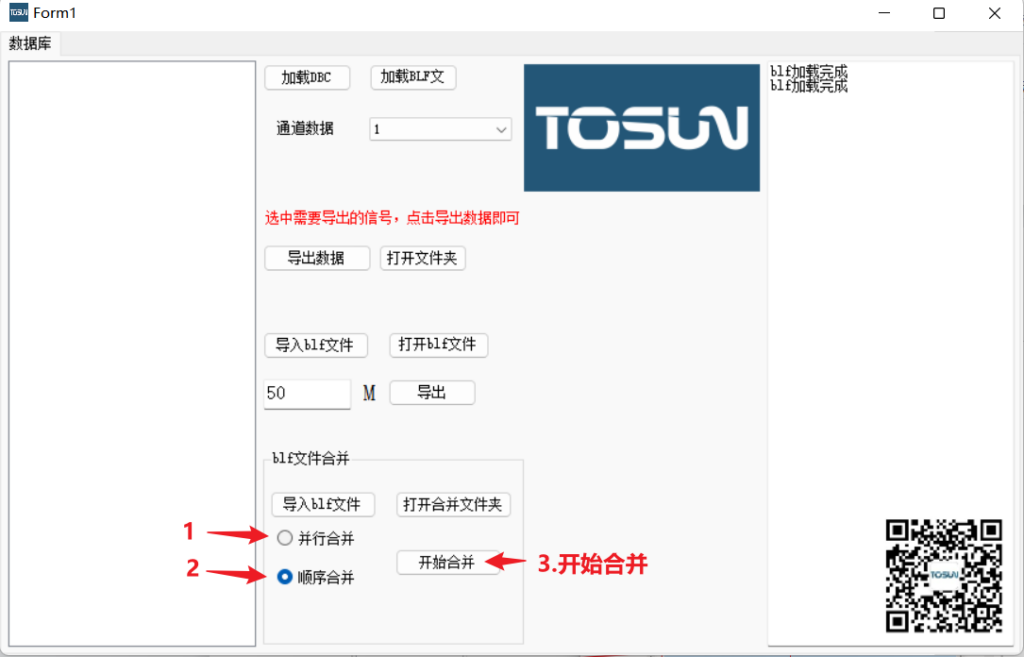
4 When the merge is complete, you can open the merged folder to view it.
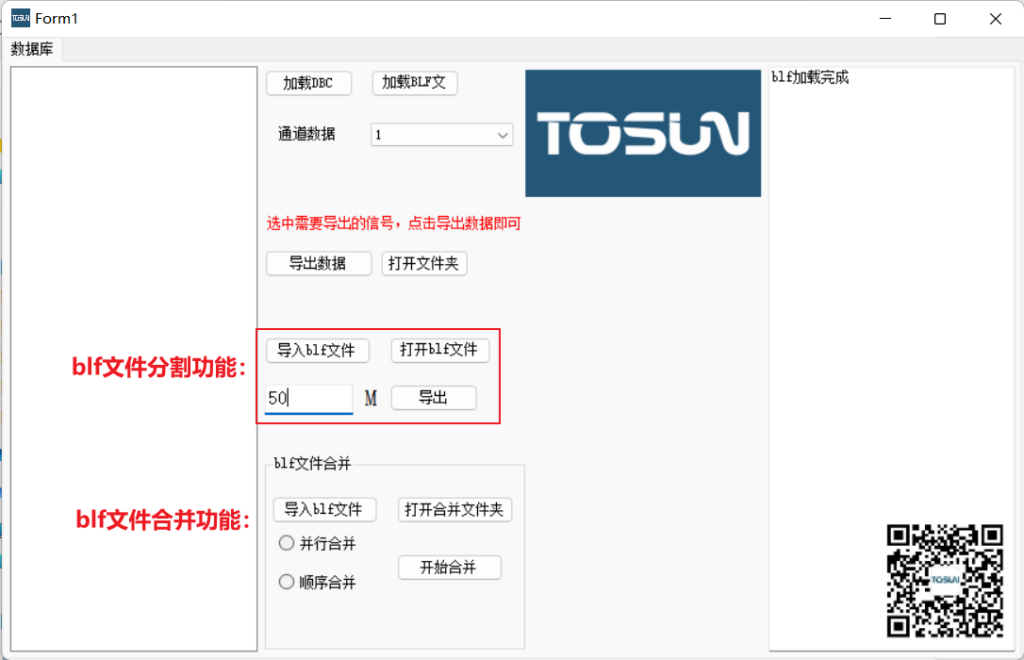
● Blf split function operation:
1. import the blf file to be split.
2. enter the desired split file size, e.g. 50M
3. Click Export.
4. Open the merged folder to view it.