This paper focuses on how to bridge the gap between the ECU algorithm and the whole vehicle model based on TSMaster.
I. SDK integration into the TSMaster operating environment
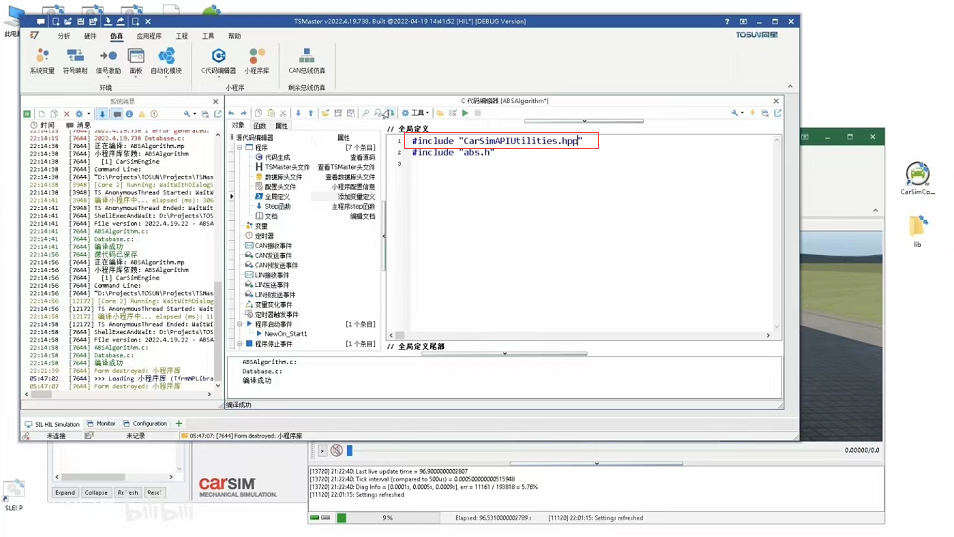
Since this video uses the CarSim engine client that comes with the CarSim controller, some configuration of the code base is required, which means that the relevant sdk files of the CarSim controller development package need to be referenced. We open the codebase of the ABS algorithm applet.
Go up to the common folder, this folder can store multiple applet common header files and code files, we will drag the SDK files into this folder.
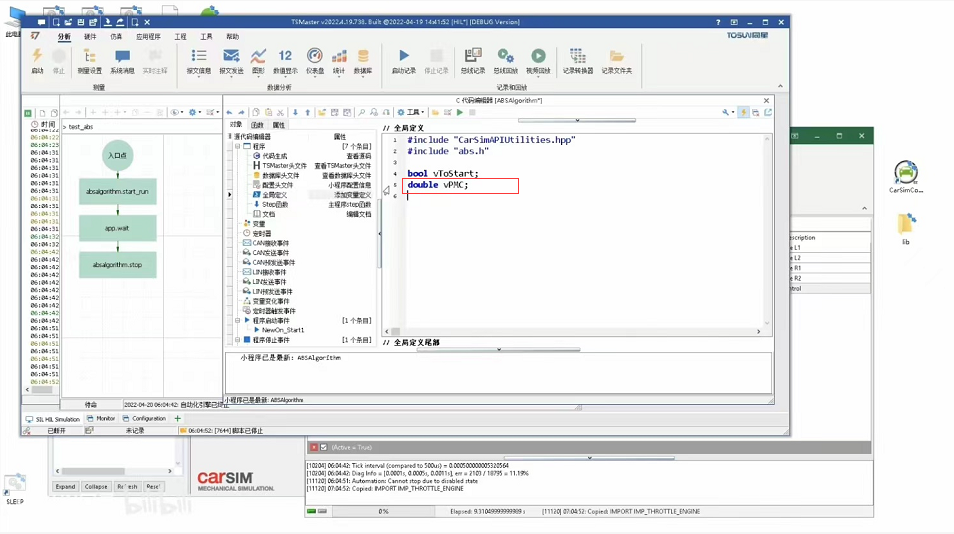
Then go to the global definition, the first line of code, referencing a C++ header file #include "CarSimAPIUtilities.hpp".
Then click on compile and you can see that the SDK is also integrated into the TSMaster runtime environment.
II. SDK control dynamics model
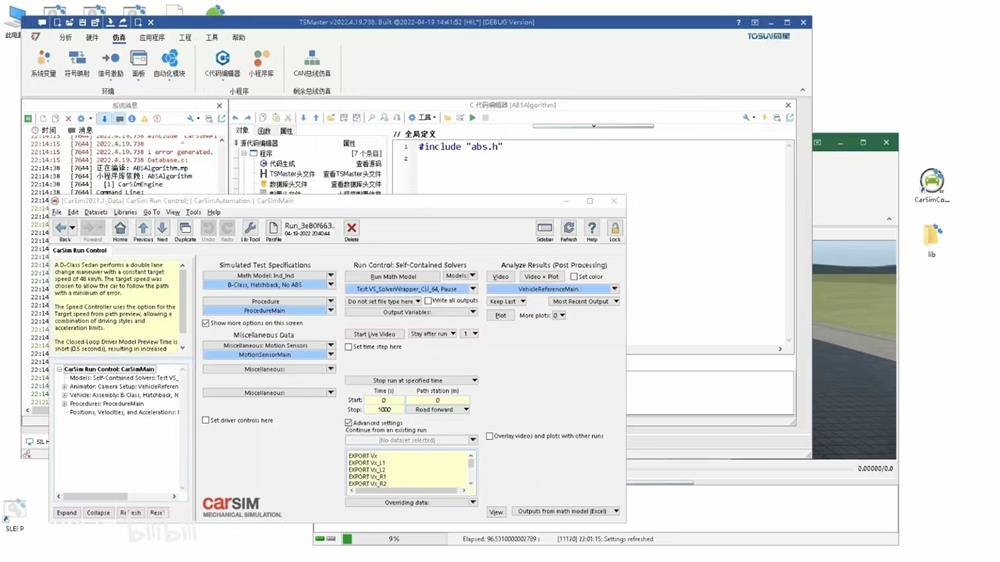
Next, we can easily control the dynamics model by calling the SDK.
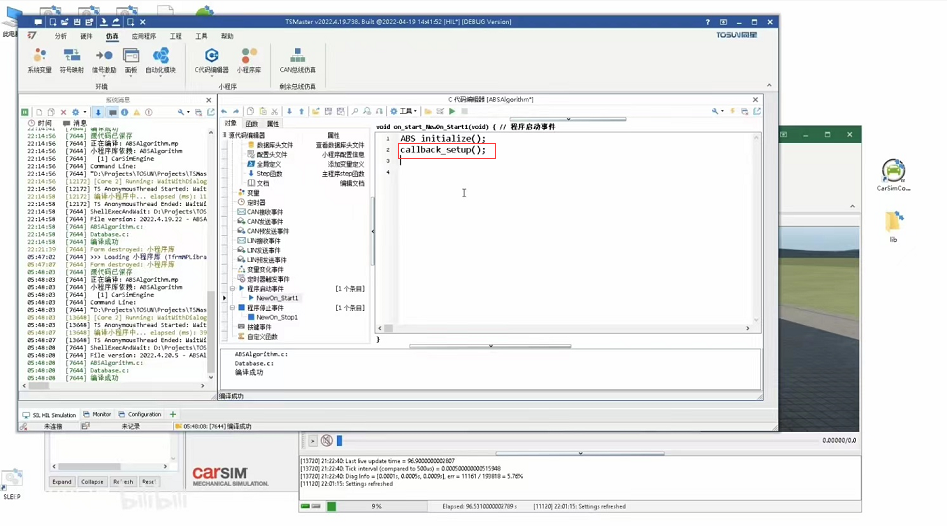
We can use the 47 API functions that come with the CarSim engine to operate CarSim, or we can use the SDK based on the CarSim engine, which is much more concise and divides the entire CarSim control into three phases: initialization, run, and end of run.
The initialization function is called callback_setup and is placed in the program start event.
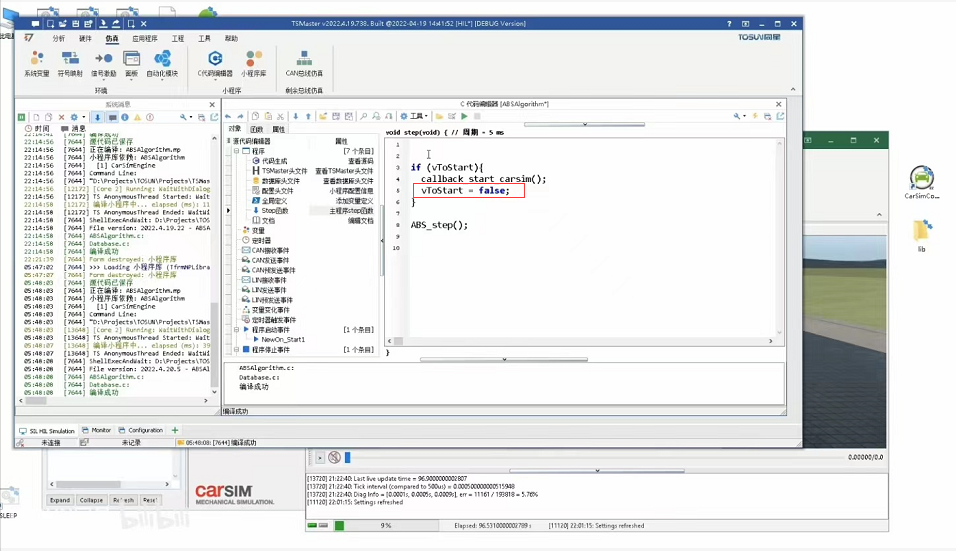
Run a function called callback_start_carsim, put it in the step function, and have it execute only once; this requires applying another global variableThe amount vToStart, to implement a single operation.
an end-of-run function named callback_teardown, placed in the program stop event.After writing we compile the program and run it.
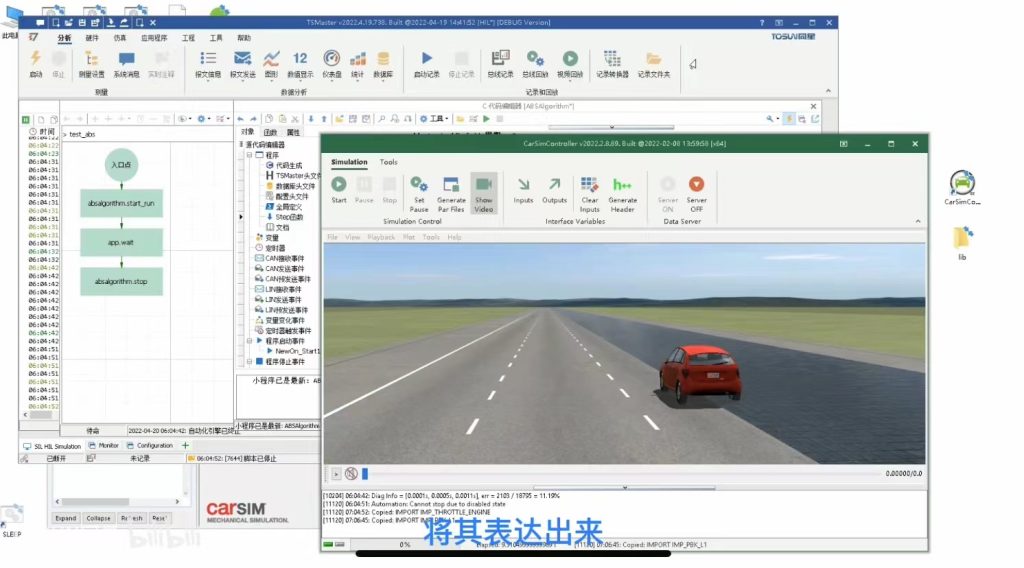
III. Vehicle acceleration simulation test
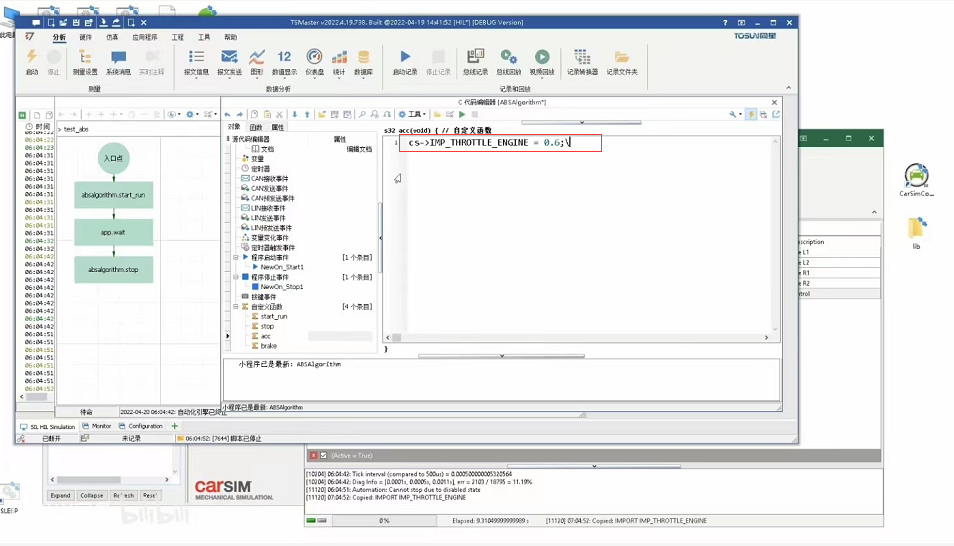
Next we try to accelerate the vehicle and apply the emergency brake when the speed is higher than 80kph. To do this, we just need to define two more API functions in our ABS applet, which we named acc and brake.
In acc, we manipulate the throttle, and at this point we need to go to the CarSim controllerCopy the input variable name, throttle, cs->IMP_THROTTLE_ENGINE = 0.6;
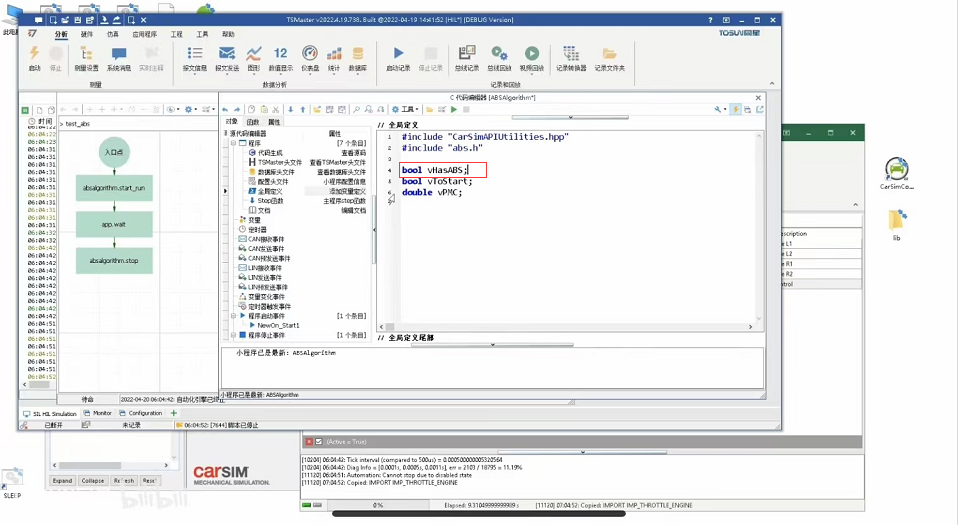
In brake, we simulate the driver pressing the brake pedal at 150 bar for emergency braking, which requires setting the master cylinder pressure to 15MPa. We set a global variable vPMC to receive this master cylinder pressure, and we also need to declare this vPMC in the global definition.
To compare the braking effect with and without ABS, we first try the case without the ABS algorithm, then this pressure will act directly on the four wheel cylinders, here we also need to declare a variable vHasABS, the default is false.
Then we come to the step function and use vHasABS to distinguish whether the algorithm is executed or not, if the algorithm is not executed, then we directly assign the cylinder pressure.
After completing the logic, we need to observe the wheel speed and pressure. These variables are from the whole vehicle model, how can we observe them? We can express them using the variables of the applet.
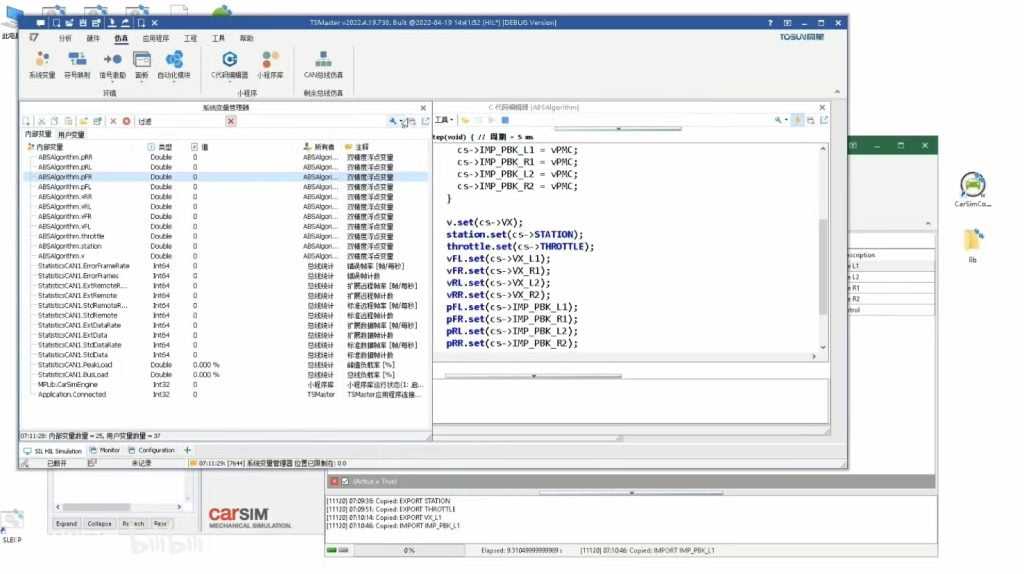
Go to the Variables group, right click to add a variable table, enter the speed, distance travelled, throttle, individual wheel speeds and individual pressure values in order. After clicking OK, a series of variables are declared. Unlike the global definition, these variables are system variables and can be used by other applets or bygraphics or panels and other windows to get and automatically draw curves.
We return to the step function and need to assign values to these system variables in turn, using the set operation
v.set(cs->VX);
station.set(cs->STATION);
throttle.set(cs->IMP_THROTTLE_ENGINE);
vFL.set(cs->VX_L1);
vFR.set(cs->VX_R1);
vRL.set(cs->VX_L2);
vRR.set(cs->VX_R2);
pFL.set(cs->IMP_PBK_L1);
pFR.set(cs->IMP_PBK_R1);
pRL.set(cs->IMP_PBK_L2);
pRR.set(cs->IMP_PBK_R2);
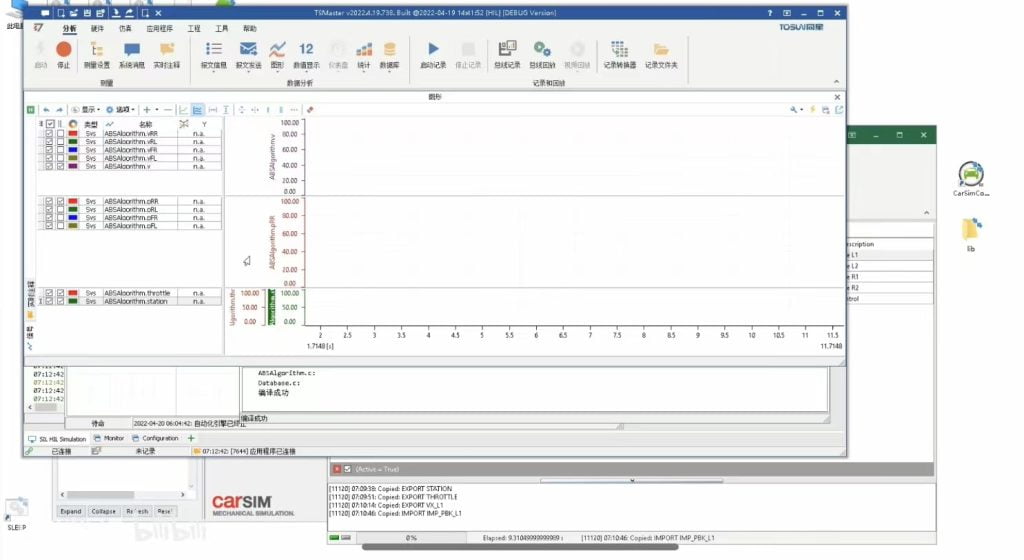
Then run the program and open the system variables table to see the set of monitoring variables we have added to this applet.
We open graphics and divide the graph into three columns, with the top column showing speed, the middle column showing pressure, and the bottom column showing information such as throttle and distance traveled, followed by adding each system variable for observation.
Then we move to the automation module and make some modifications to our existing logic, which means that after starting, we wait for the vehicle to accelerate to 80 km/h, then brake, and only stop the simulation when the brake reaches a speed of 0.
Beta version updated weekly, full version updated monthly
Installation environment
1
Windows 7 SP1 or higher, supports Win10, and WIn11.
Operating System
2
8GB
random access memory (RAM)
3
At least 550MB of free space
disk space
4
Dual-core (2-core) or higher
CPU
Please ensure that your computer meets at least these requirements in order to install and run the TSMaster software successfully. If your computer does not meet these requirements, it may cause performance problems or not run the software properly. You may want to consider upgrading your hardware if you need smoother running features.