This chapter continues with the second chapter of the TSMaster Toolbox IDE series, Python-based interface design. Let's take a look at how to do minimalist development of the toolkit in the TSMaster environment.
Table of Contents for this article
I. Creating space
1. Check the Python environment for readiness
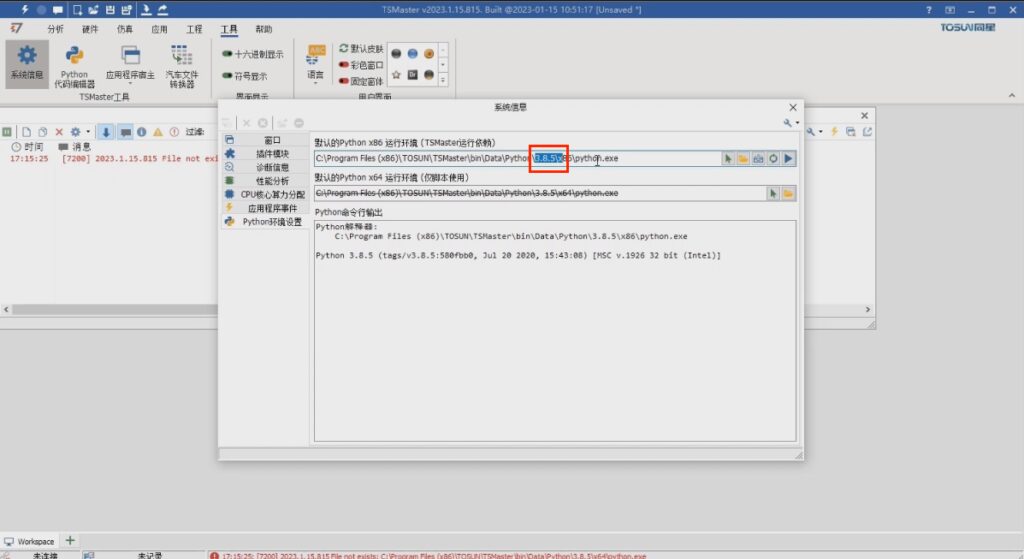
Open TSMaster, go to Tools-System Information-Python Environment Settings page, in which users can choose the default running environment of Python x86 and x64. The latest version of TSMaster supports x86 version and x64 version, which can be configured according to whether the Python program developed by TSMaster is 32-bit or 64-bit, and you just need to Depending on whether the Python program developed by TSMaster is 32-bit or 64-bit, you just need to configure the corresponding running environment.

2. Configuration box button operation
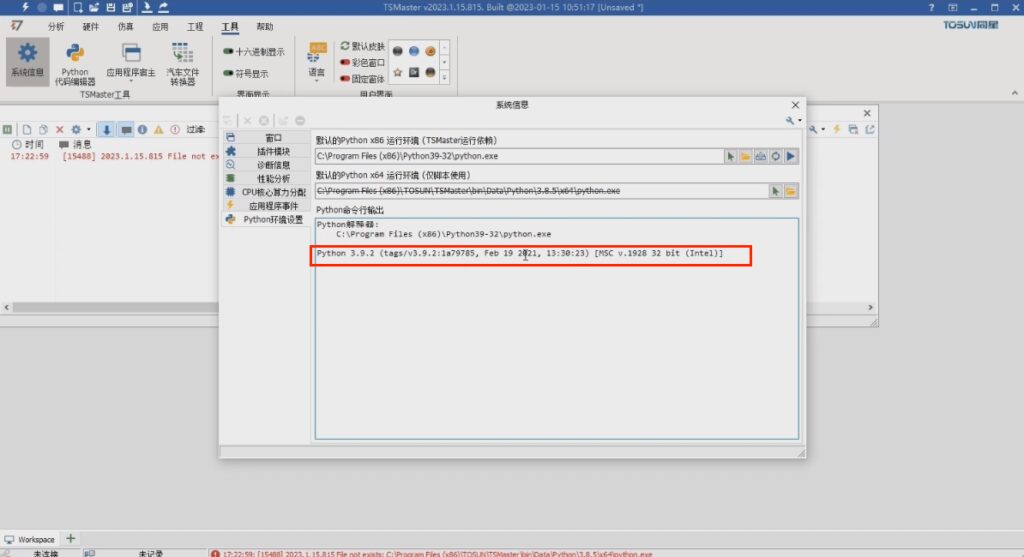
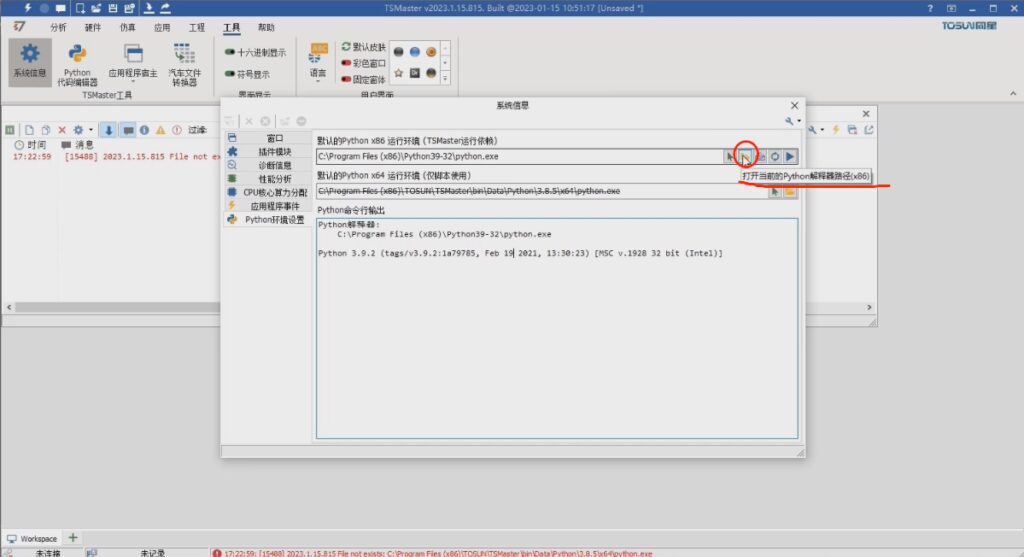
There are 5 buttons on the right side of the configuration box. The 1st button, Select Python Environment, when clicked, will bring up a dialog box where you can select another Python path. For example, if you have installed Python version 3.9 locally, you can completely change TSMaster's Python environment to version 3.9, and you don't need to always use the Python version that comes with TSMaster. After selecting version 3.9 and clicking Open, you can see the prompt that you can use the latest Python interpreter after restarting TSMaster software, just follow the prompts to restart and reopen TSMaster again. go to Tools - System Information - Python Environment Settings, you can see the output of the Python command line, which will show the current version number of the Python and the compile time and other detailed information. time and other details.

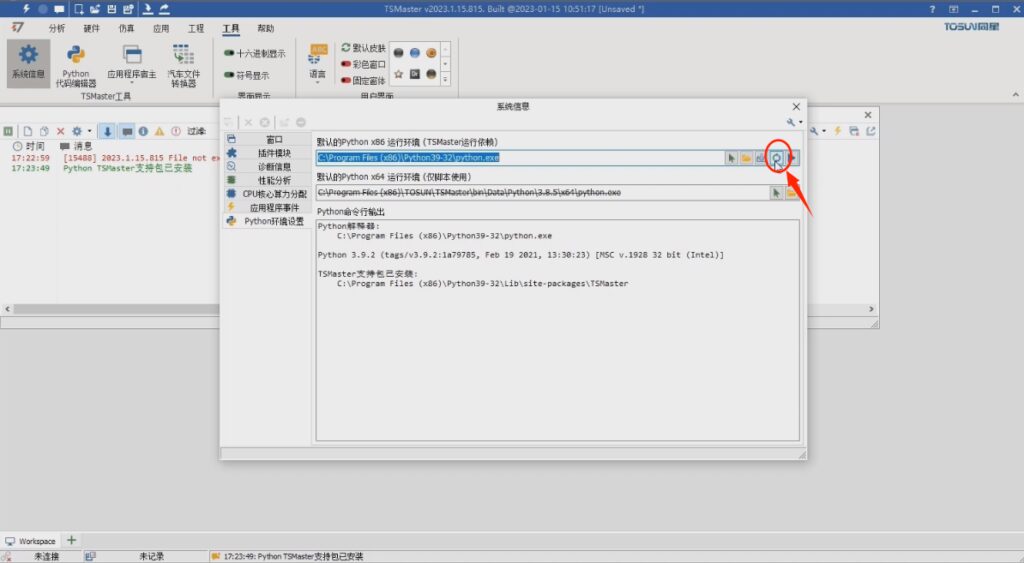
The 5th button, which is to test if TSMaster's support library is working properly, will print the name of the API function in the support library and other information when clicked. If the test is successful, the TSMaster support library is available.
3. Creating toolbox windows
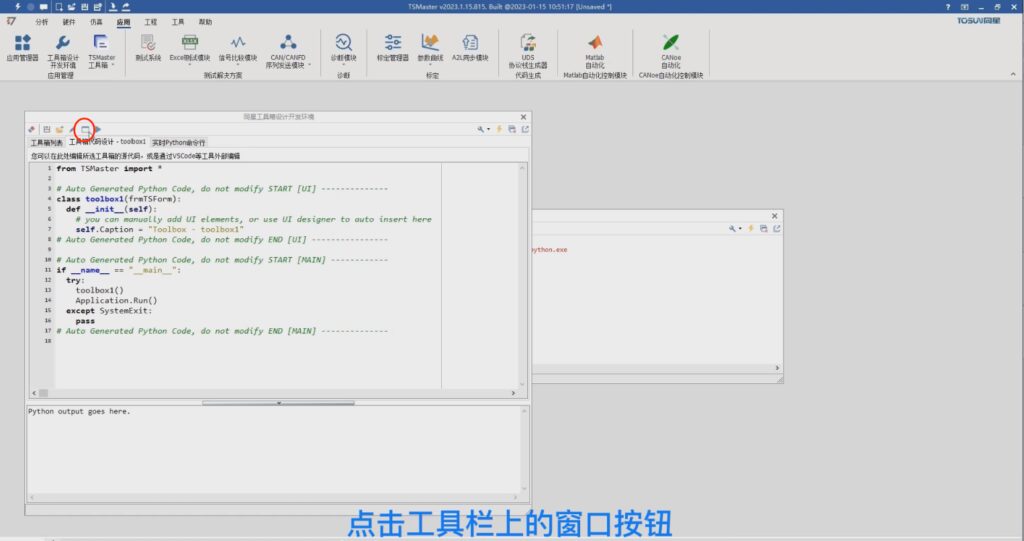
Open the application, Toolbox Design and Development Environment, the first page is a list of existing toolboxes, click the "+" Add button on the toolbar to create a new toolbox. Enter the name of the toolbox. For example, toolbox, press enter and a new toolbox is created.

II. Modification of space attributes
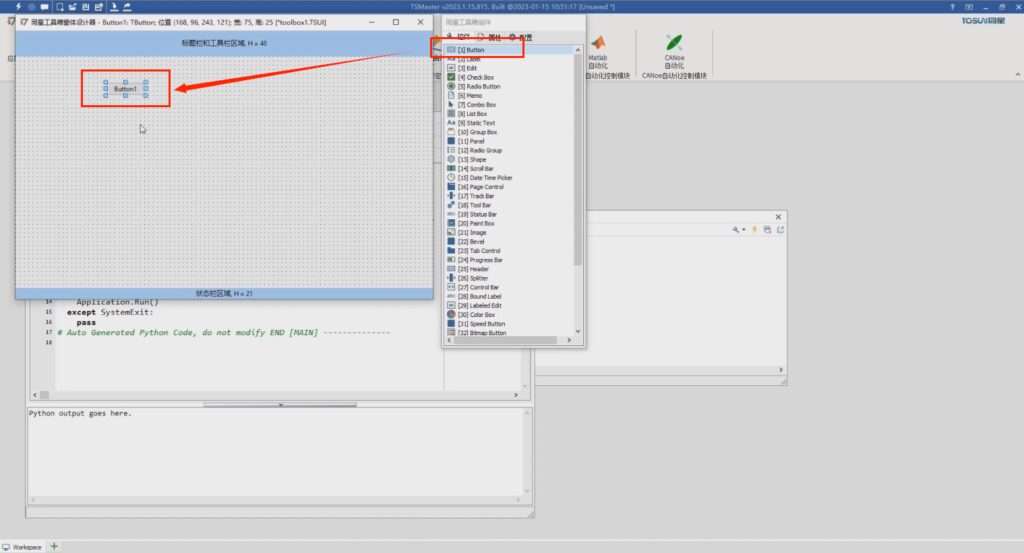
Come to the Controls page, select the first line of the list Button, click, come to the form area, and then click to create a button, the button is in the selected state by default, press F11, or click on the right side of the properties, you will come to the control's Properties tab. The default name of this button is Button1, where there is a Name, change it to btnTitle and change its Caption to Set Title.
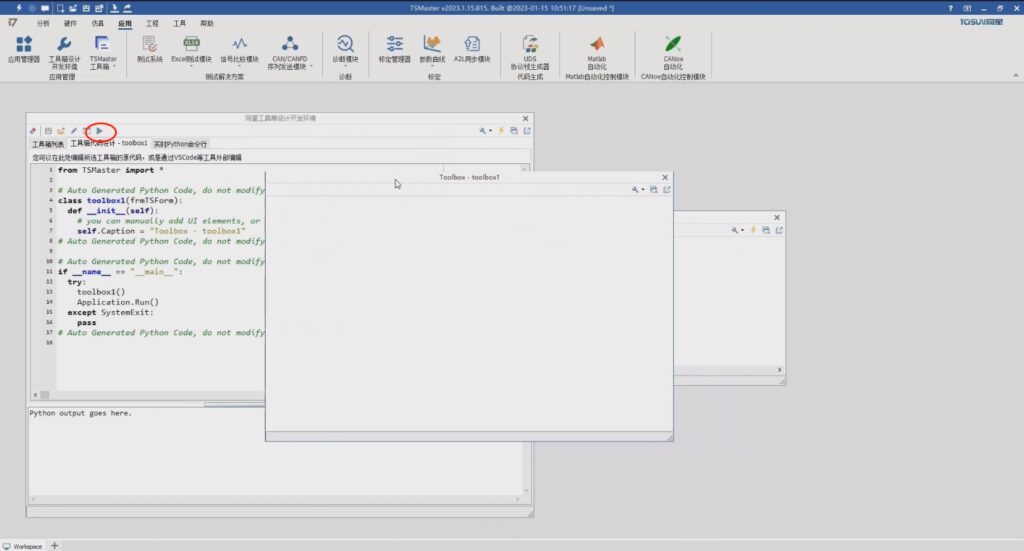
If you need to preview the effect, you can go to the Configuration tab of the component window and see that there are two buttons for code generation, the first one generates the Python code only, the second one generates the code and then runs the window at the same time, and if you click on the second button, it will close the current editor.
III. Generating code
1. New property settings
Mainly divided into two pieces of content, the first is the init function, the second is a variety of user-defined to the toolkit code design area, you can see that the empty form of the code added to the window's attribute settings, as well as the creation of buttons and attribute settings and so on. It should be noted that, sandwiched between two lines of green comments in the code is automatically generated and controlled by the form designer, do not recommend that the user to modify their own, because any modification will be followed by the code generation again to cover.
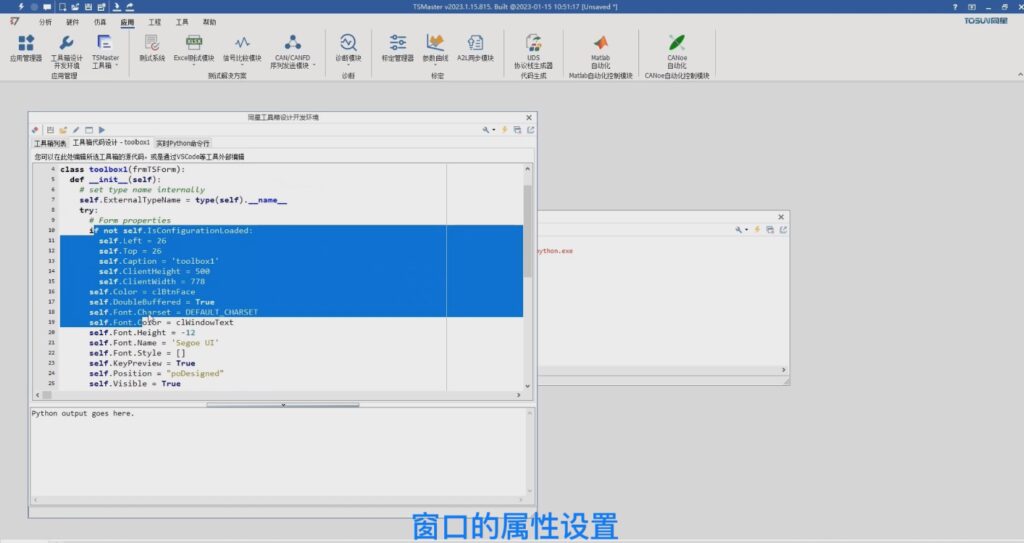
Here, it is recommended that you use a professional editing tool to edit externally, and the recommended tool here is VS Code.
2. Writing event handlers
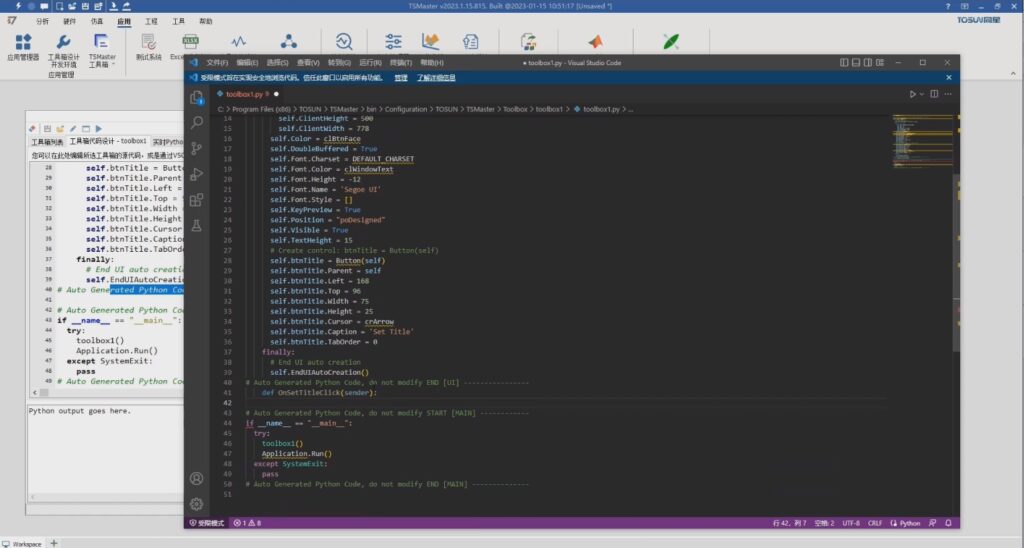
First, in the initialization function, associate the button click event to an event handler function. We can start by defining this function in our code. For example, below the function body of the init function, go ahead and write def OnSetTitleClick. note, note that the first parameter of a UI event is always sender, the source of the event trigger, so functions of this type generally have at least one parameter.
Next, you need to set self, that is, the Caption of this form in the processing function to Hello World, then this function is written. Finally, we just need to self.btnTitle OnClick event associated with OnSetTitleClick, the code is written.
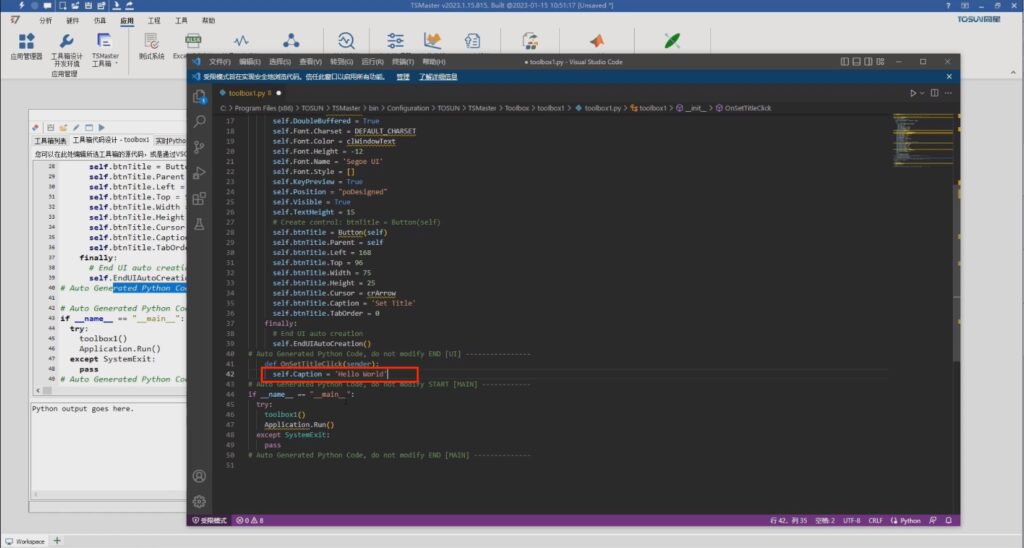
Back to TSMaster, after clicking on the edit box, we will see that the file will be refreshed to the latest state, then we can press F9 or click on the triangular start button to run the program, click on the triangular start button to run the program, you can see that the title bar of the window changes to Hello World, which is the minimalist design process of the toolbox.
IV. Stand-alone function of the toolbox

At this point the toolbox window is again running independently from the main TSMaster program, which is the standalone form of the toolbox window. This means that the toolbox window replaces the main TSMaster window as a standalone application, and TSMaster runs in the background, providing all possible support for the Python window, but all of TSMaster's built-in functionality is still available.
About More
Above is this chapter for you to introduce the simple design process of the TSMaster toolbox, more use of tutorials can be viewed on the B station video ~!


