
overviewPreface
TSMaster recently updated five modules of new features, including network simulation checksum and rolling counter localization support, J1939 multi-frame message sending and receiving, MATLAB automation control module and so on. I will give you the next tweet in the form of graphic tutorials to explain one by one.
Today we introduce a new feature of TSMaster - localized support for checksum and rolling counter in network simulation, which makes it easy to implement network simulation with checksum and rc without writing a single line of code.
I. Old version VS new version
Old VS New version
Older versions >
First review the old method, which is to simulate each signal using an applet, open this example and then press F5 to start the simulation, you can see the increasing rolling counter, which is this triangle wave in blue.
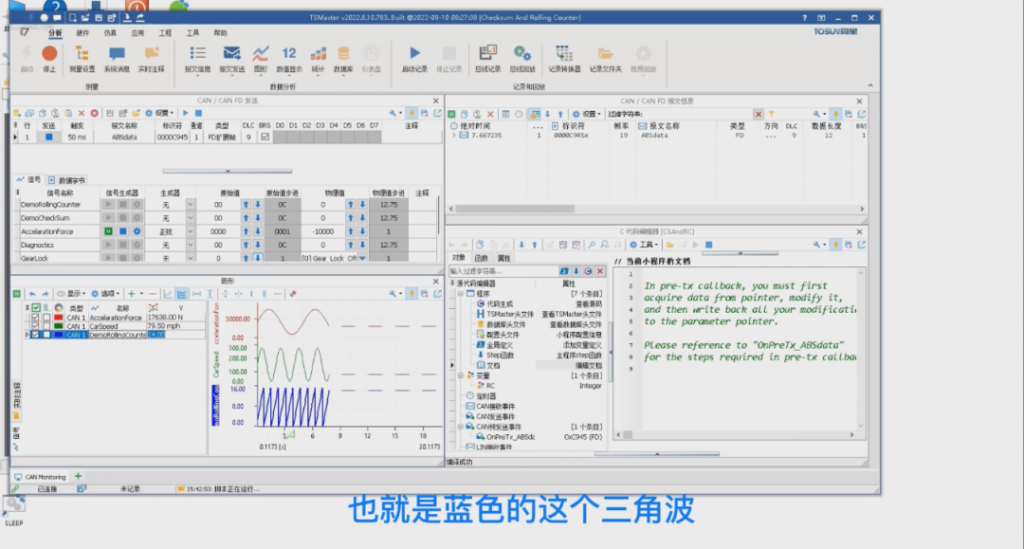
We expand trace and drag the checksum into the graph window to see the checksum in real time. In the pretx callback function, we need to write a program to directly control the checksum and rolling counter signals. If it involves a large-scale network simulation, it will take a lot of time to process each signal one by one, which is prone to errors, and it will also bring efficiency problems.
New Releases >
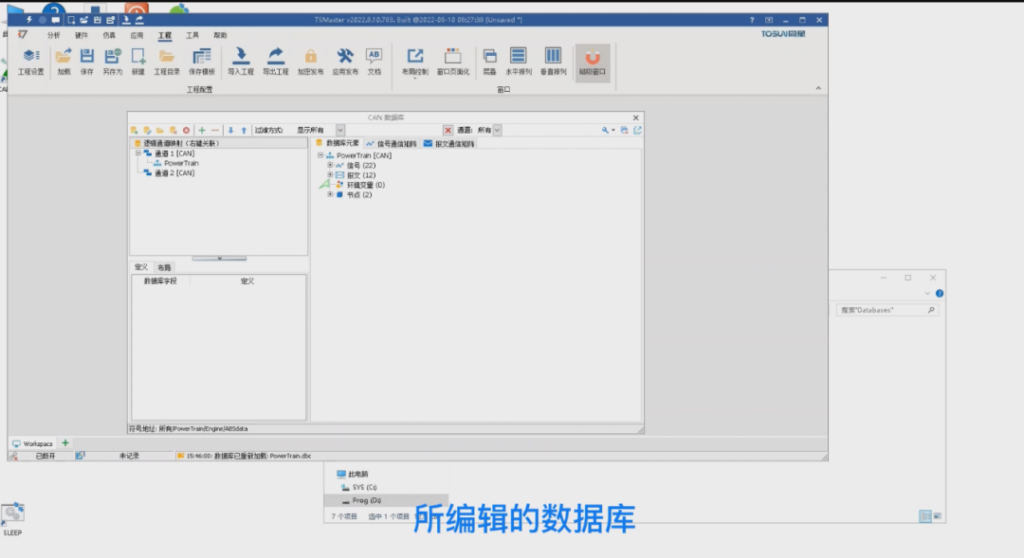
The new feature doesn't need to handle each signal manually, so let's create a new project and try it out. Open Project - Project Catalog and find the sample database that comes with the TSMaster installer. For example powertrain, let's drag it in and see that the database is already loaded.

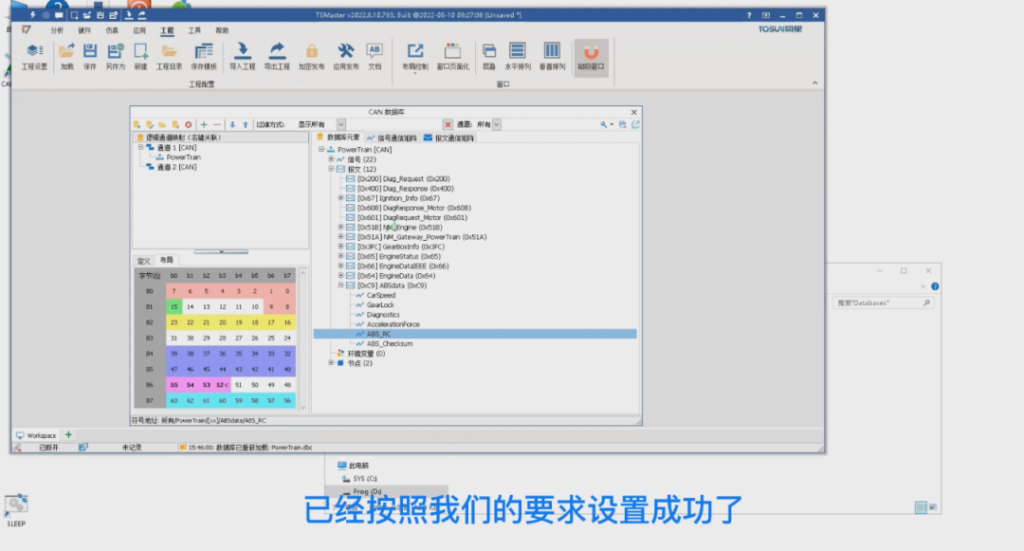
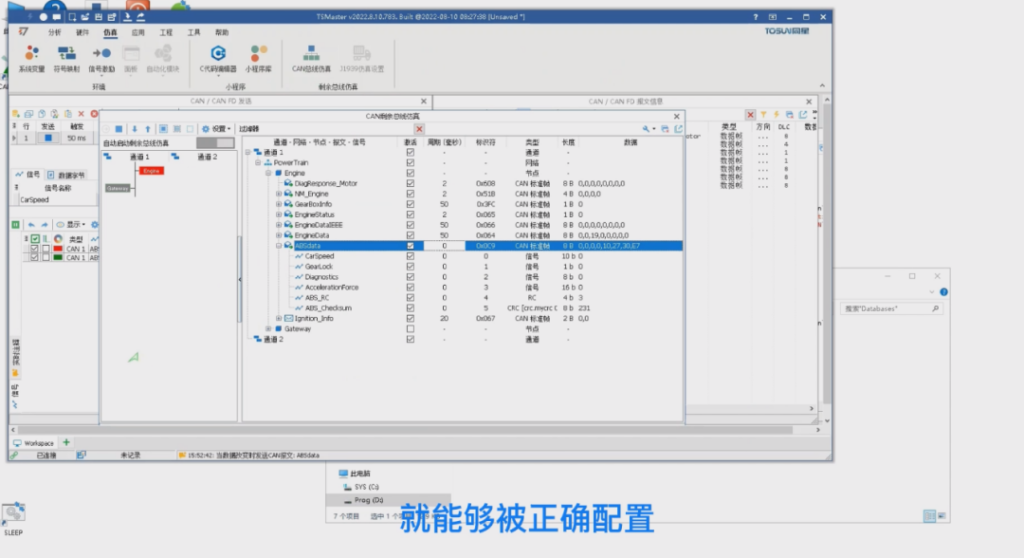
We choose a frame, take ABS data for example, we can see that this message does not have checksum and rc, we need to modify the database to add these two signals, click the Edit button, open the database editor, we create two new signals, named ABS checksum. checksum is generally 8-bit unsigned, and then there is another is ABS. rc is generally 4-bit unsigned, and then drag these two signals into the ABS data message. ABS. rc is generally 4-bit unsigned, and then drag these two signals into the ABS data message, then we open the configuration window of this message, change the dlc to 8, switch to layout.

We can drag our newly created rc to the right position, next is to set the position of checksum, this is our new checksum signal, as checksum is to protect the data content of the message, usually located in the first byte or the last byte of the message. Here we drag this signal to the last byte, which means the protection range is from 0 to 6 bytes, click OK, then click Save, then click Close. You can see that TSMaster will automatically refresh the edited database.
At this point we expand the message, select abs data, switch to the layout window, and we can see the two signals we have added, one is rolling counter, between bits 52-55, and the other is checksum, between 56-63. The new checksum and rc have been set up successfully as we requested.
II. checksum and rc localization support
localization support for checksum & rc
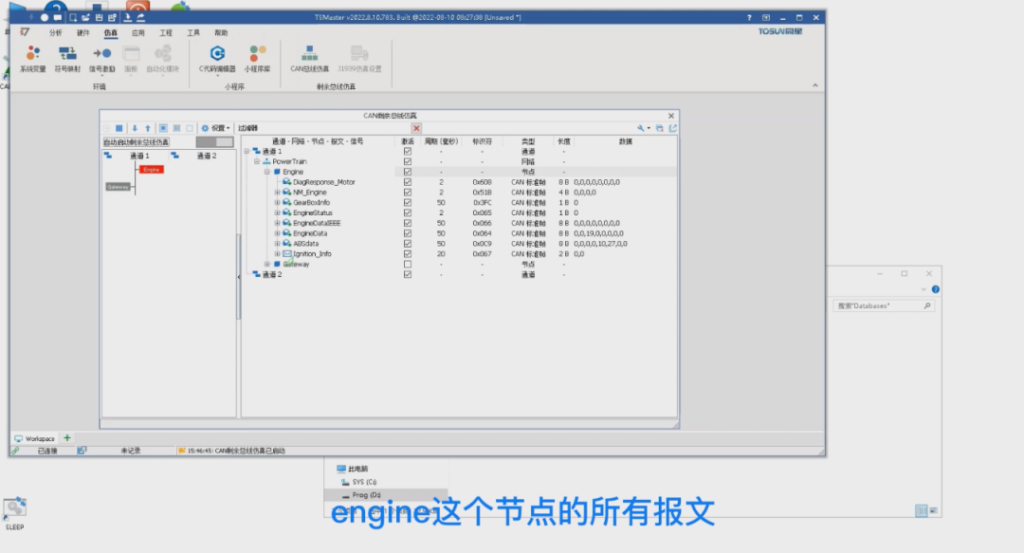
> Close the database editor, switch to emulation, open the rbs window, double-click to activate the engine node, set it to self-start emulation, and then press F5 to start the emulation, which will allow rbs to emulate all the messages from the engine node.
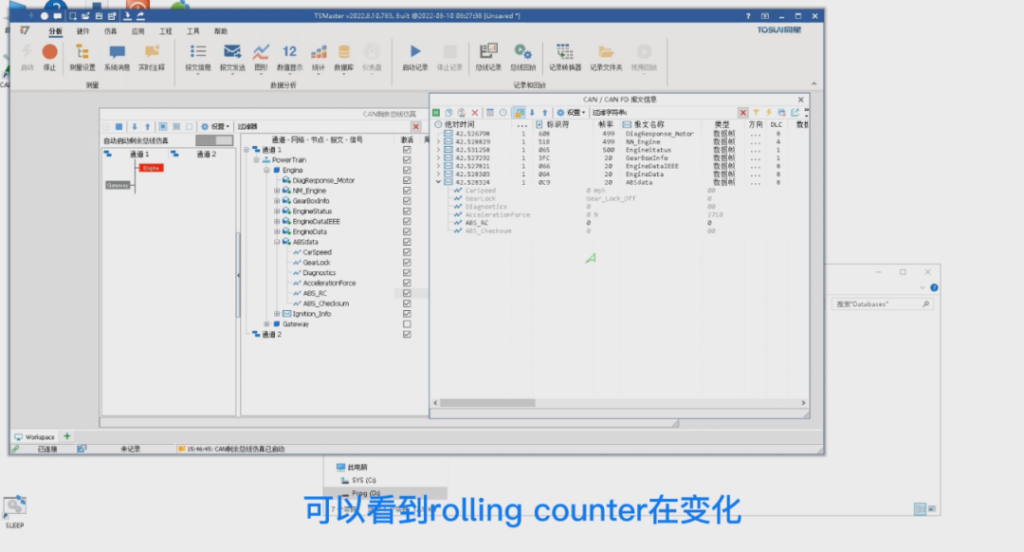
Switch to analyze, open the trace window, expand the abs data message, you can see that we have added rc and checksum are the default 0, this time we need to configure, back to the rbs window, right click on the rc signal, set it to rolling counter signal, the settings will take effect immediately, you can see the rolling counter is changing.
>then open a graphic window, drag rc into the graphic can see the sawtooth wave, that rc has been effective, the next step is to configure checksum. checksum involves the installation and editing of the crc algorithm library, this signal is not able to configure it in real time, so we first press F6 to stop the simulation, and then right-click on the checksum signal, select the signal set to checksum signal, then the first setup will see the system will install the default crc algorithm library, and will pop up the crc algorithm list after successful installation.
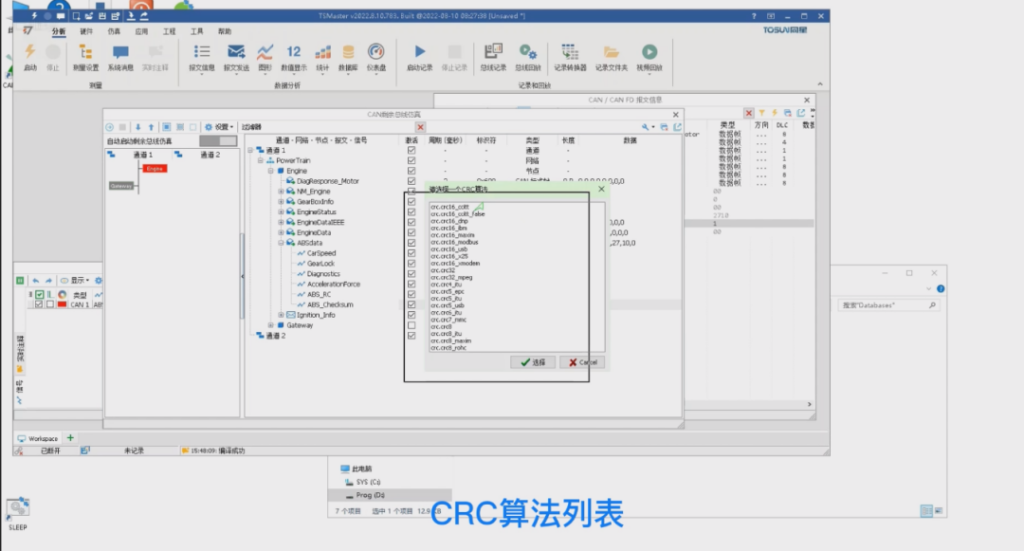
We can choose any algorithm, for example crc 8. At this point we have successfully associated the crc 8 algorithm with the checksum signal. At this point there is one more configuration item that needs to be confirmed, that is the protection range of the checksum signal, the default is to start from 0 bytes and protect the next 7 bytes, then this can be changed at any time. We can right click and select Edit crc algorithm parameters to see the configured crc signal table.
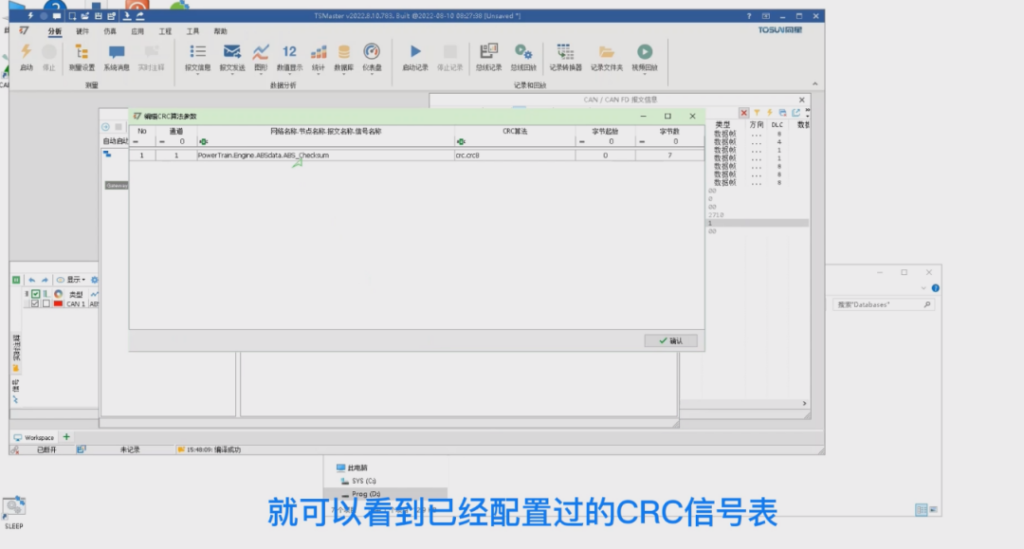
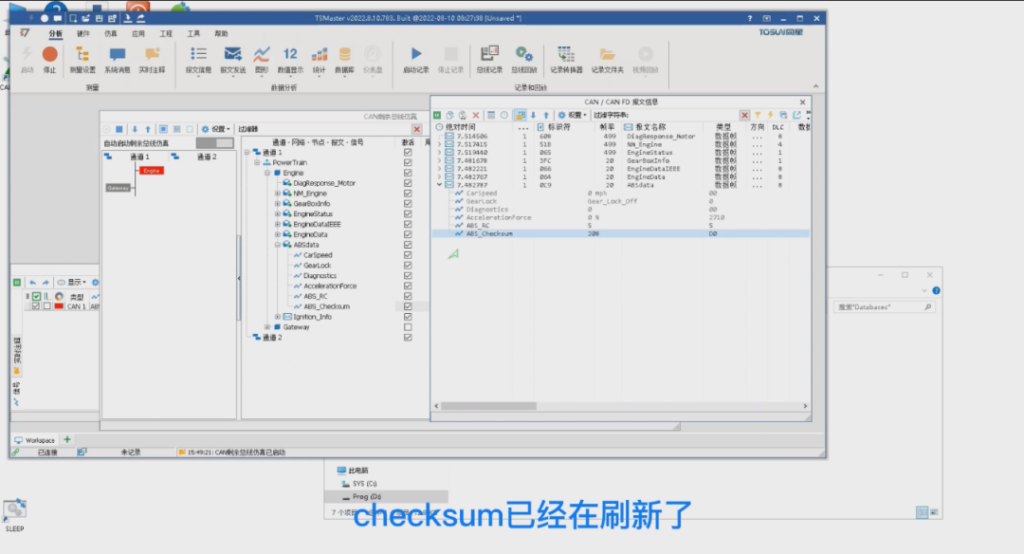
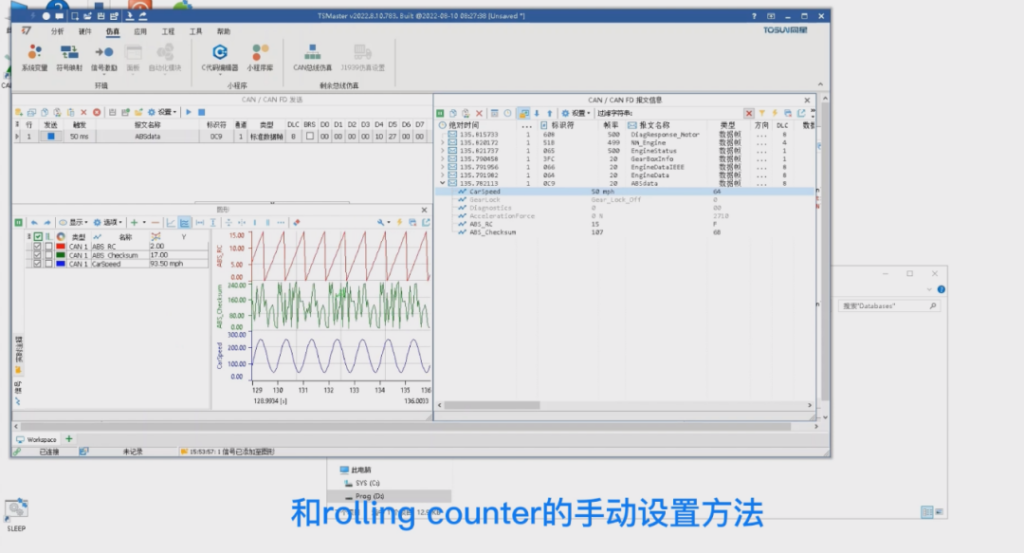
Then double-click on any signal in this table, you can also continue to modify his associated crc algorithm, this time we do not modify the algorithm, we only need to know that this window is able to change the protection of the beginning of the byte as well as the number of bytes of protection can be. So we now click on the confirmation, and then we press F5 again to start the simulation, expand the abs data message, we can see checksum has been refreshed.
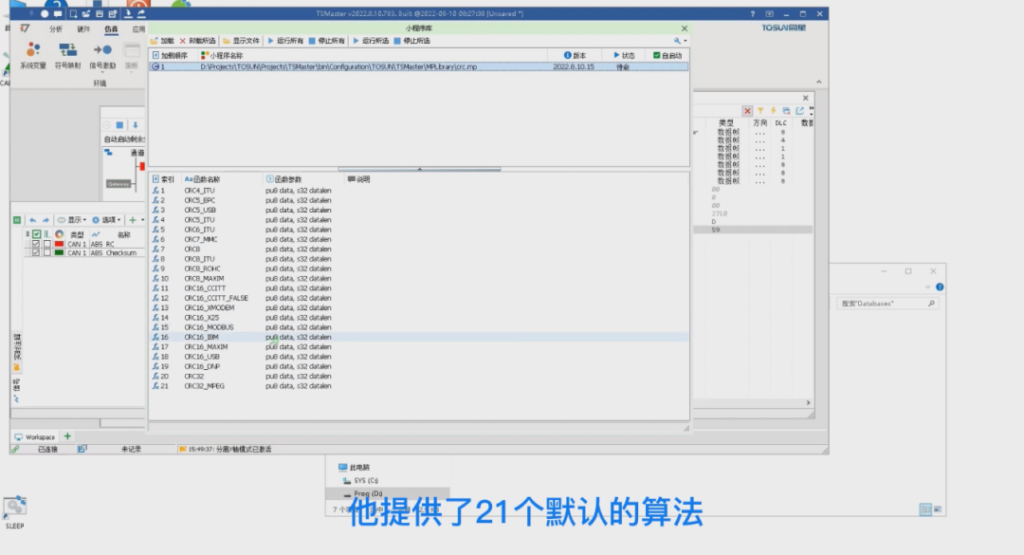
>We drag this signal to the graph window, we can see the real-time curve of checksum, and generally, the algorithm of checksum is customized by the company, we can completely rewrite the default crc's algorithm library to do this. Click on Simulation - Applet Library, you can see that the default crc's algorithm library is just an applet library, he provides 21 default algorithms.
We can find the source code of this algorithm library in the c code editor, note that this small program is provided as a library file, there is no independent start and stop button, we develop a crc algorithm here. Tap the right button to add a custom function named mycrc, the parameter list can be randomly selected copy, and then we can copy in the contents of the existing algorithm. For example, this crc8, and then modified on this basis, we can change at will, for example, will be this poly = 0x17, if you want to install our new this function into the system, only need to compile this algorithm library can be, of course, the process of compilation needs to be guaranteed.

First of all, we have to stop the simulation, because the current algorithm library is still being used by the rbs engine. At this point, if we click compile again, we can see that the compilation has been successful and has been automatically installed on our system.
Third, how to realize the real-time curve
How to achieve real-time curves
We open the bus simulation, right click on this signal, re-select the crc algorithm, select our mycrc, you can associate successfully. Then we press F5 to start the simulation to switch to the graphics window, you can see different checksum real-time curve, this is because the entire message inside only rolling counter of a signal in the change, so the checksum signal curve has a certain regularity, then at the same time, we can also let the other signals are also moving, how to do this? How to do this?
1、Manual setting method
The fastest one is to use the signal generator in the send window. We can first change the period of this message to 0 in the rbs window, then in that case the rbs will not send this message automatically, then we switch to the send window, click on add message from database, select our abs data, we click on send, and then we switch to the graph window, and we can see the same curve as before. This is the power of the new feature, which means that no matter which module of the system the message is sent from, as long as rbs is active, the checksum and rolling counter of the message will be configured correctly.
Next we can stimulate other signals in it, for example the signal carspeed, we can select the generator as a sine wave, configure the offset to be 150 because it ranges from 0 to 300, and then click on Apply to close it, and click on Launch Generation, and at this time you can see that the checksum changes, and at this time, we drag carspeed in, and we You can see the real-time curve of all the signals. At this time the checksum shows irregular changes, this is because there are two signals changing at the same time, then the above is how to set checksum and rolling counter manually.
2、Automatic setting method
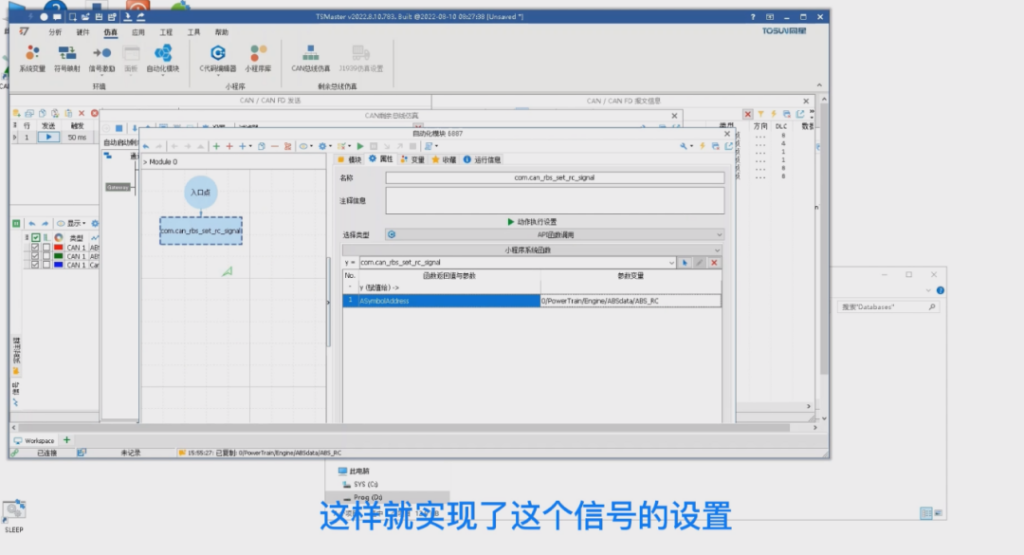
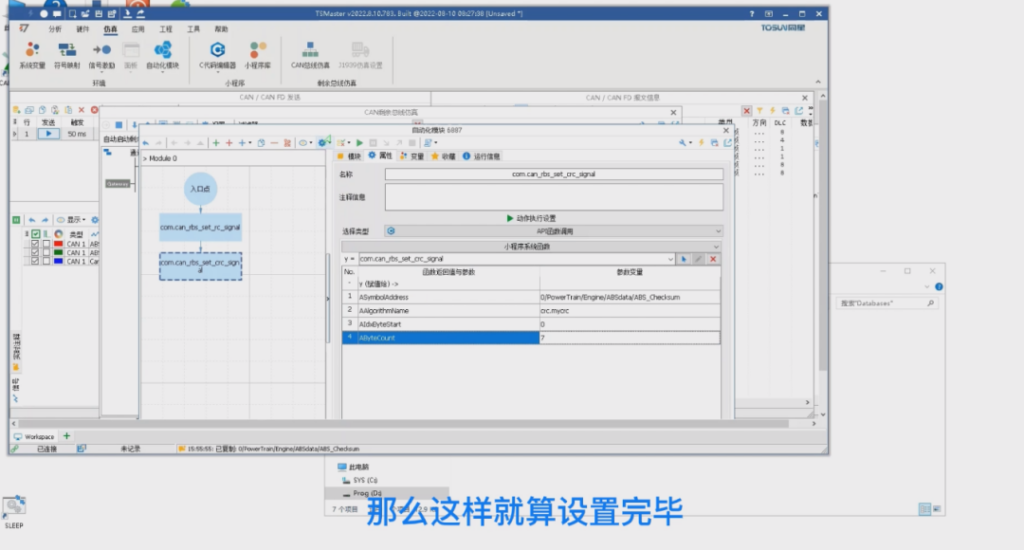
We can also do through the small program API to automatically set up, first of all, you can clear the configuration of the two signals, as long as the right-click on it, choose to set as a common signal, the two signals will no longer have a function, you can see that the two signals become the default value, then we can open the automation module, add a new function call, search rc can be found with the rolling from it. The one related to counter is this can rbs set rc Signal, which has only one incoming parameter, which is the database address of the signal. Then we go to the bus simulation and copy the database address of the top right button of the rc signal, so that we can realize the setting of this signal.
Then we can add a function call, press enter to create a new action, and then we choose crc related functions, then you can see this function called set crc Signal, he has four parameters. The first is also the signal address, we will do as we have done, select checksum database address, fill in the second is the name of the algorithm, then the name is actually just what we have selected mycrc, then in front of this need to add the prefix of the program, so it is crc.mycrc. then the small program you can see that his name is crc, so you only need to add the name, then add the function name to the point. name plus the point, plus the function name to copy over it, and then the beginning of the bytes he protects is from the beginning of the 0th byte to protect 7 bytes, then this is set up.
About More
Above is the full usage of the new features in this release, we'll see you in the next issue! (For more details on how to do this, you can watch our B-site video directly~)


