During the UDS diagnostic process, it involves the issue of security access, which is also called Seed&Key. TSMaster Diagnostic Module supports loading the Seed&Key algorithm for security access unlocking through a .dll file. In the recently released version 2024.03 of TSMaster, it not only supports DLL files encapsulated in C/C++, Delphi and other languages, but also supports DLLs based on DotNet platforms, such as C#, VB.Net and other languages, which is efficiently compatible with security access dlls generated by different platforms, and brings engineers a more convenient use experience.
In the TSMaster installation directory, a Visual Studio template project is provided to encapsulate the Seed&Key algorithm in both C++ and C# programming languages. Users can develop based on this template project to get DLL functions that can be loaded directly.
Keywords in this paper: uds, Seed&Key algorithm, DLL template project,
C++, C#
Table of Contents for this article
C++ Encapsulation of Seed&Key Algorithm
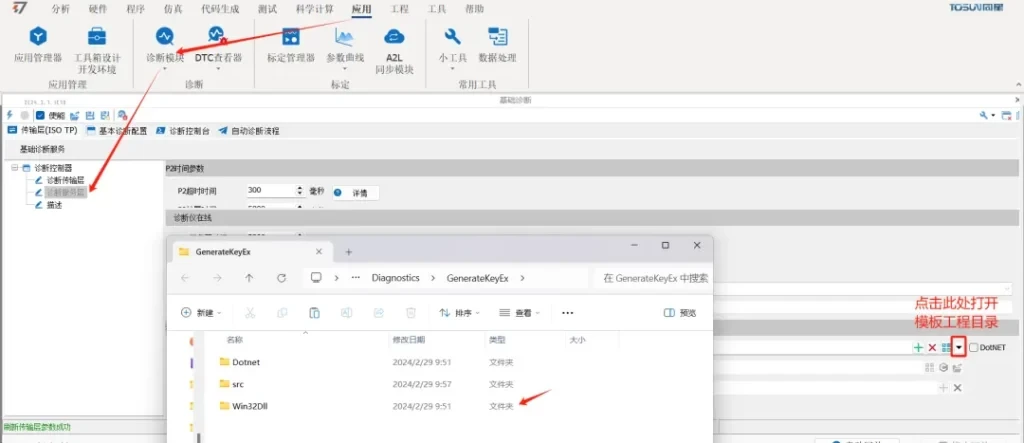
1. Open the path where the Seed&Key interface project is located in the TSMaster installation directory (Figure 1). Users can copy this project to add their own Seed&Key algorithms.
Figure 1
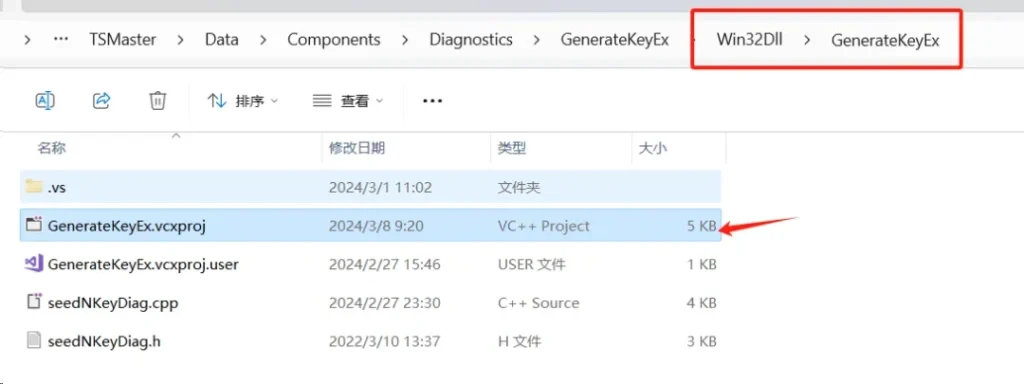
2. If you use C++ to encapsulate the Seed&Key algorithm into a DLL file, you can select the project under the path Win32DLL->GenerateKeyEx and open it.
Figure 2
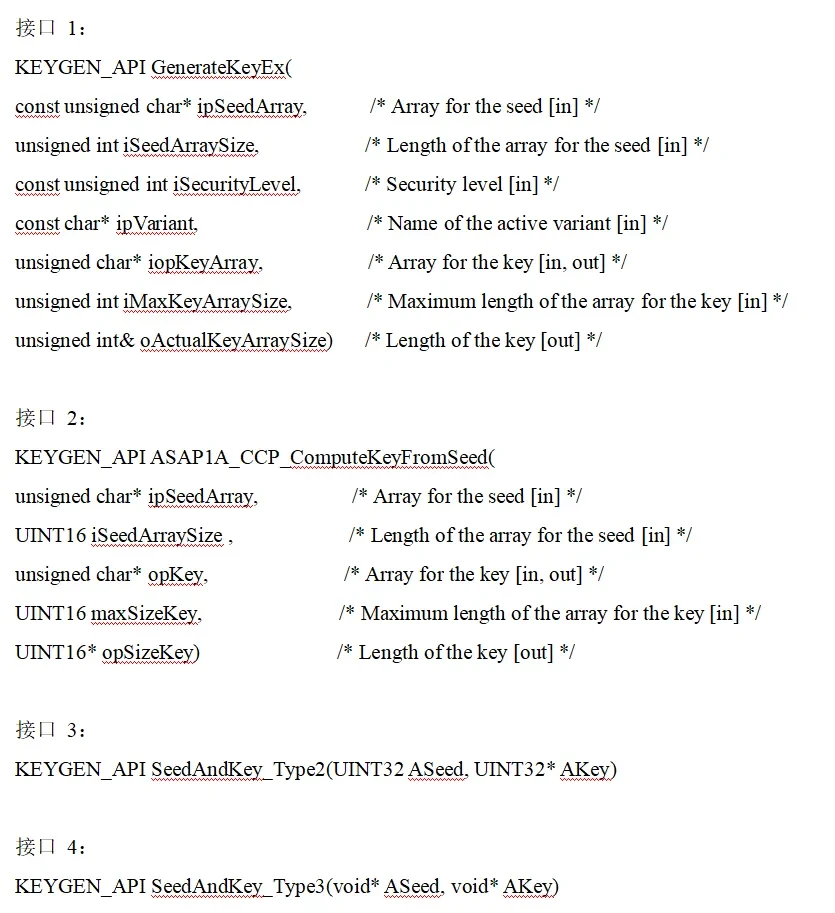
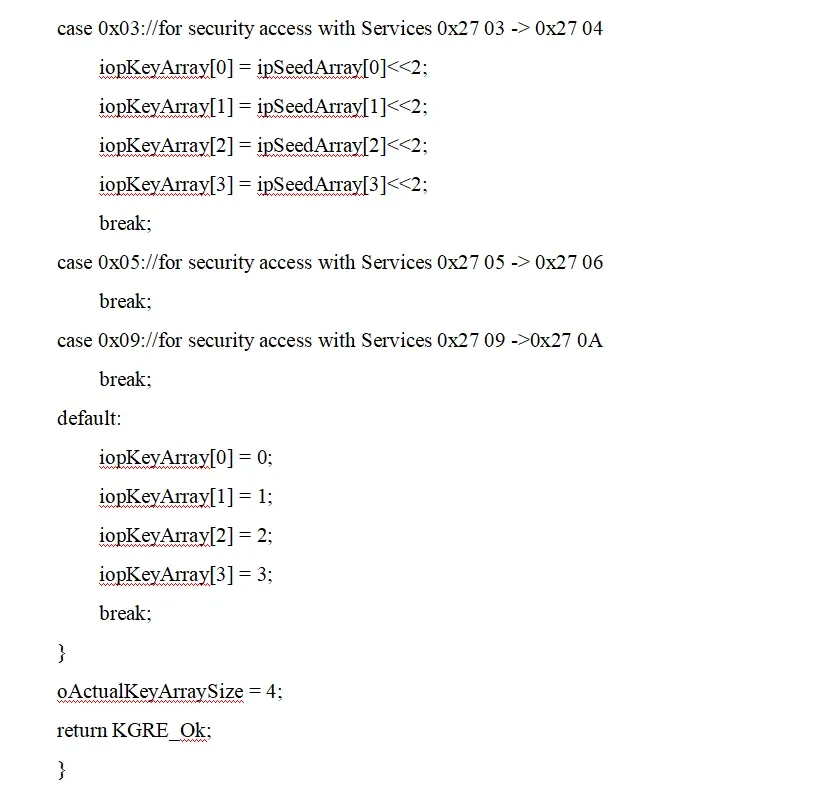
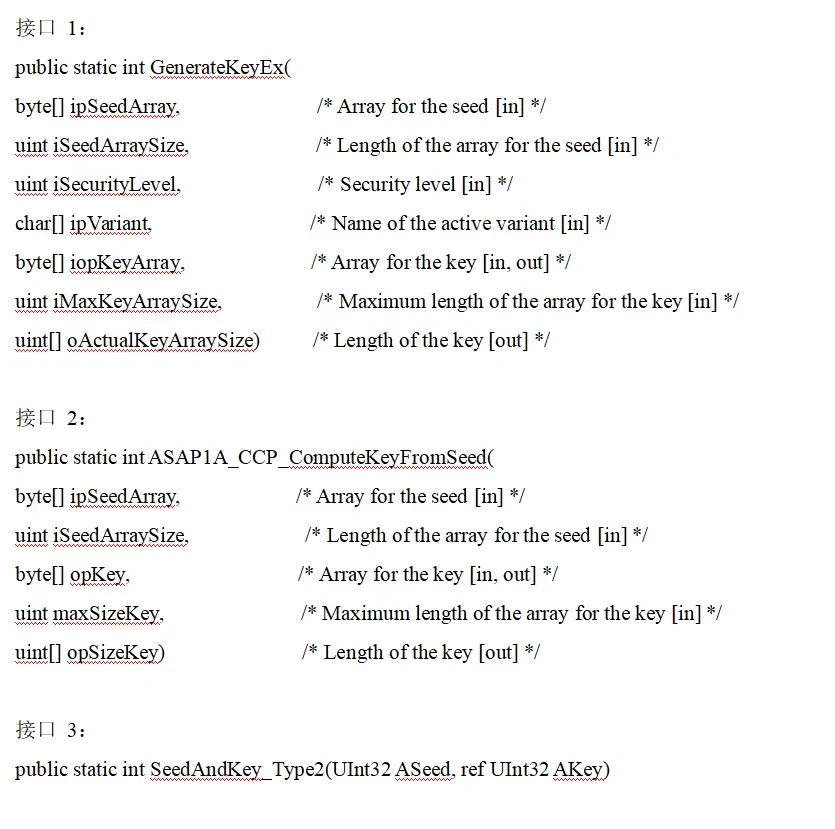
3. Currently, in order to be loaded directly by the diagnostic module of TSMaster, the DLL must implement one of the four function interfaces in the seedNKeyDiag.cpp file within the project:
Figure 3
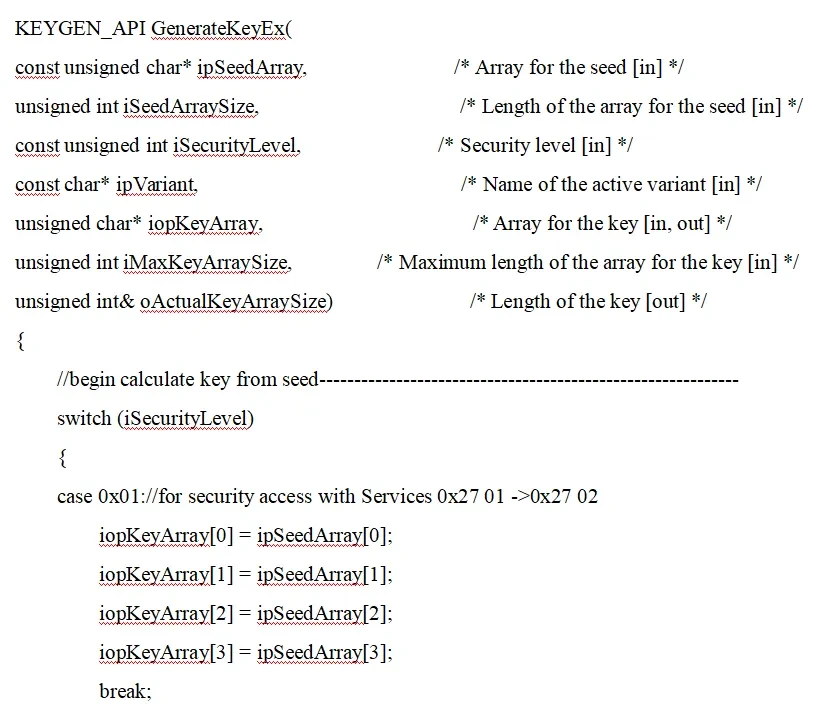
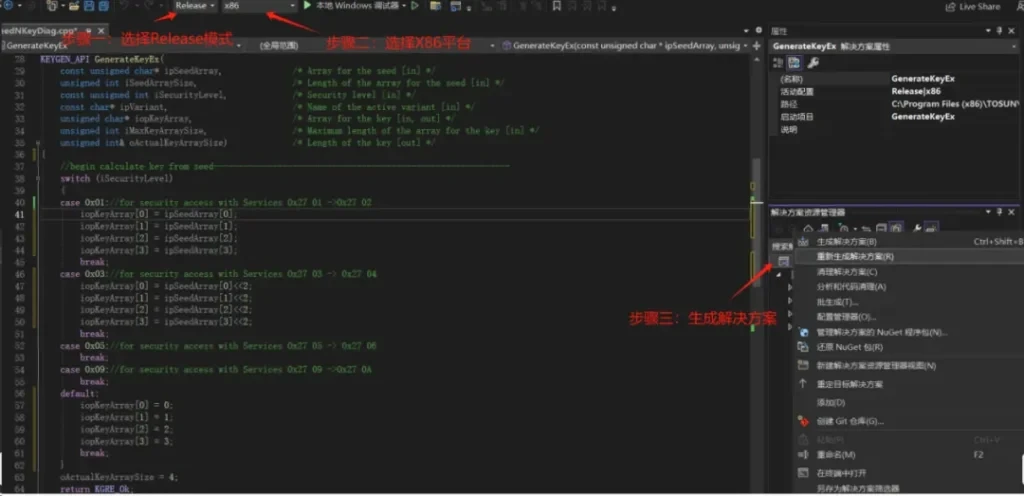
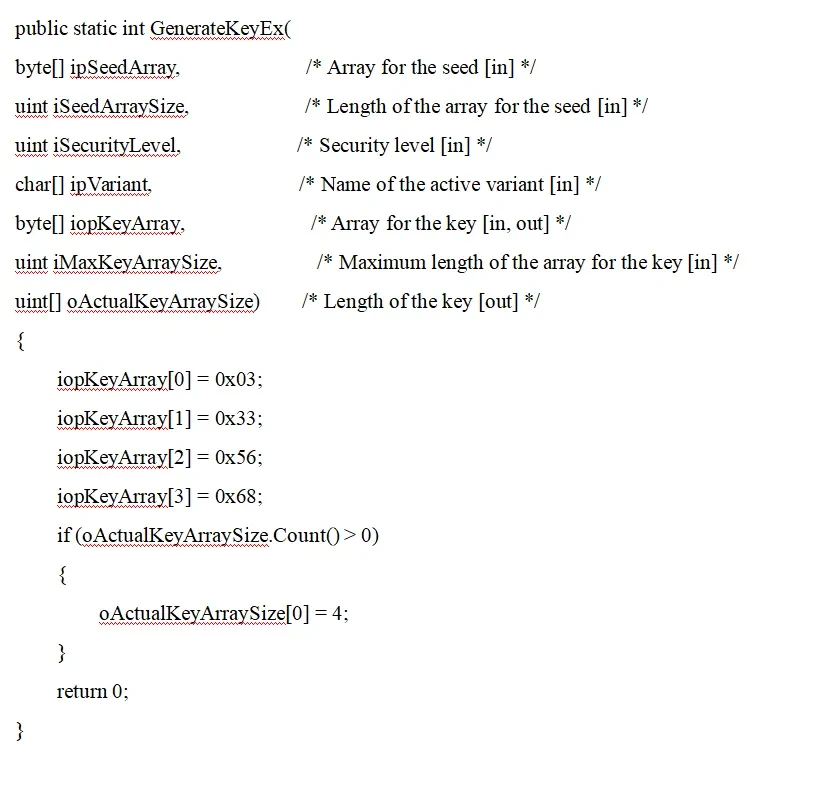
4. Write test code using Interface 1 (Figure 4), select Release mode, select the X86 platform, and right-click the project to generate a solution.
Figure 4
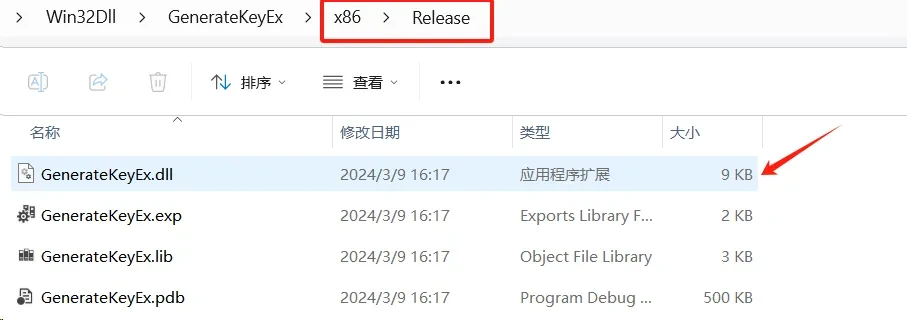
5. After generating the solution, you can see the DLL file you just generated in the x86->Release directory under the current project folder.
Figure 5
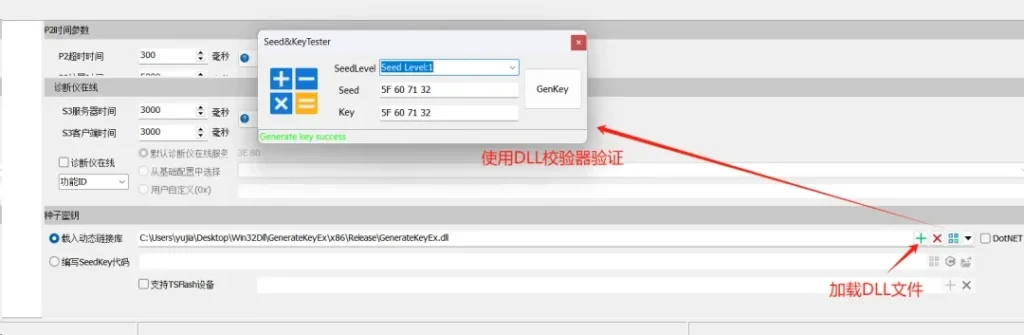
6. Load the generated DLL file and use the DLL checker to determine if the DLL interface you loaded is correct.
Figure 6
C# Encapsulated Seed&Key Algorithm
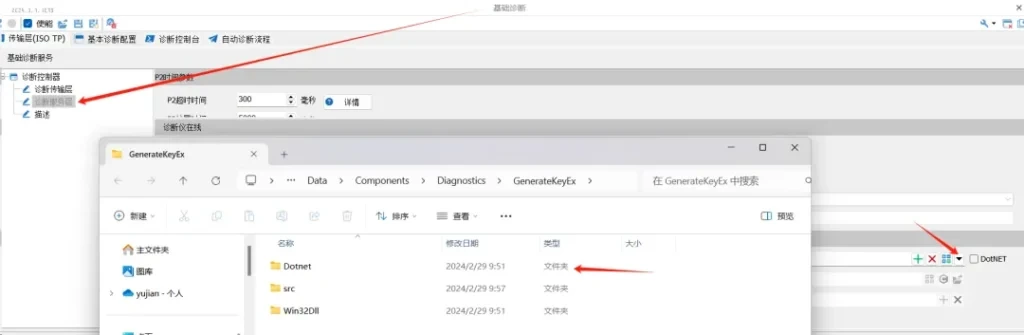
1. The steps to encapsulate the Seed&Key algorithm with C# are similar to the steps to encapsulate it with C++, select the project under the path DotNet->GenerateKeyEx and open it.
Figure 7
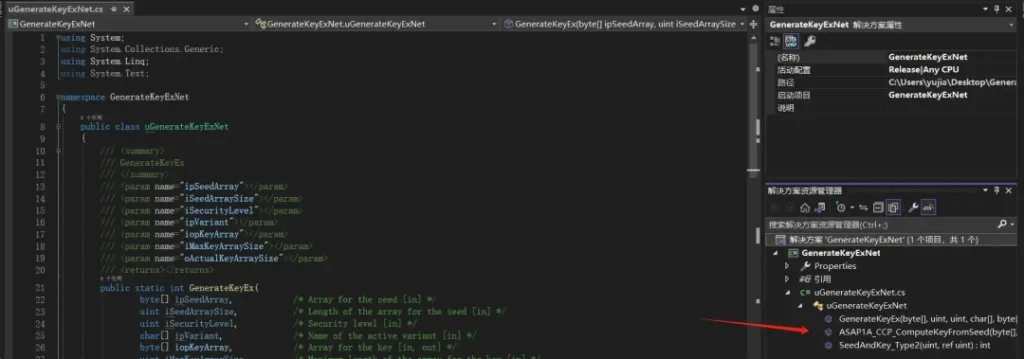
2. Open the project, you can see in the uGenerateKeyExNet.cs source file currently supports three types of C# interfaces, the realization of the following three interfaces in one of the interfaces can be.
Figure 8
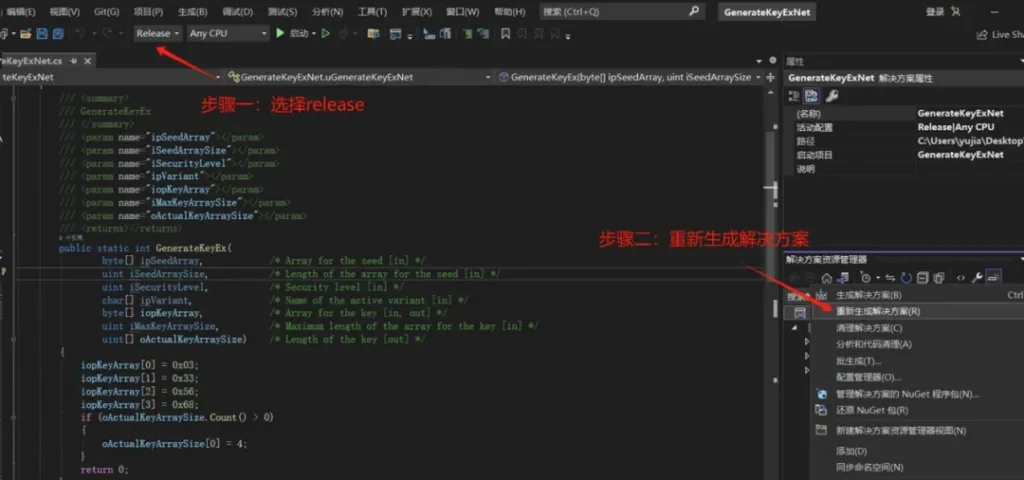
3. Write test code using interface 1, select Release, and then select Regenerate Solution.
Figure 9
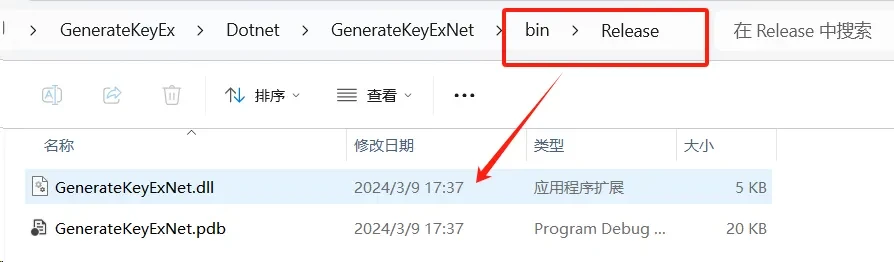
4. After generating the solution, you can see the DLL file you just generated in the bin>Release directory under the current project folder.
Figure 10
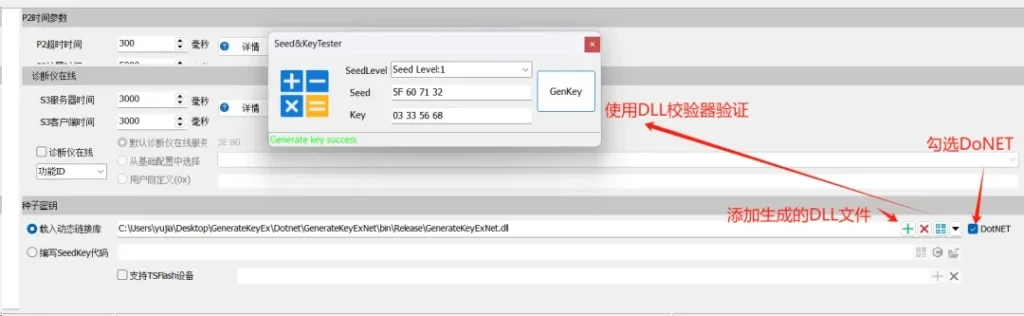
5. Load the generated DLL file, check the DoNET option, and use the DLL checker to determine whether the DLL interface you loaded is correct.
Beta version updated weekly, full version updated monthly
Installation environment
1
Windows 7 SP1 or higher, supports Win10, and WIn11.
Operating System
2
8GB
random access memory (RAM)
3
At least 550MB of free space
disk space
4
Dual-core (2-core) or higher
CPU
Please ensure that your computer meets at least these requirements in order to install and run the TSMaster software successfully. If your computer does not meet these requirements, it may cause performance problems or not run the software properly. You may want to consider upgrading your hardware if you need smoother running features.