
overviewPreface
Today we continue to introduce the new feature of TSMaster - Automation Module for determination in testing. As we all know, determination determines whether a use case passes or fails in testing, and the test logic can be easily realized with automation modules. So how can we reasonably make a judgment on the result after the test logic is executed?
You need to update your TSMaster software to the latest version. The download link of the latest version can be obtained by replying "TSMaster" in the menu bar of the public number.
1. Decision-related API functions
How can the results of a test be determined? Here we need a series of API functions related to the determination. Take a simple example: for example, the need to determine whether the temperature signal of an engine between 0-50 degrees, how to do it?
1.1 Automatic simulation
In the system's installation file, select the example database CAN_FD_Powertrain and drag it into the TSMaster environment for loading.
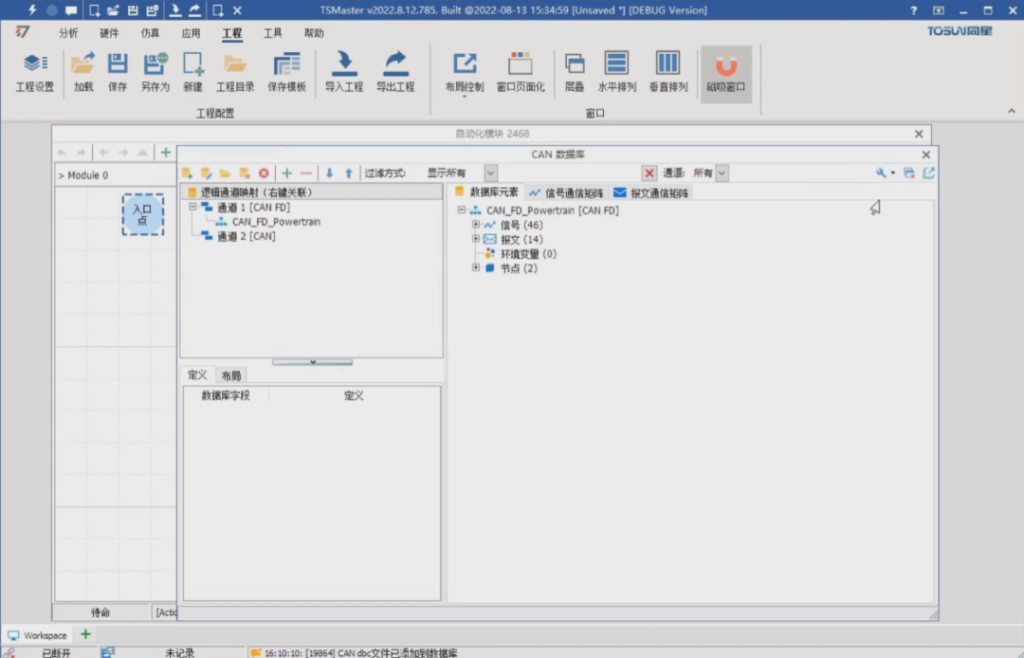
Activate all nodes via bus emulation, allow automatic emulation, and start bus emulation to emulate virtual nodes.
1.2 Range of temperature signal values
Add an action by clicking the Enter action at the entry point in the Automation module and then double-click Set. The attribute of the action is API Function Calls and enter verdict on the list of system functions in the applet and select check verdict. this function is used to immediately detect the range of the signal value.
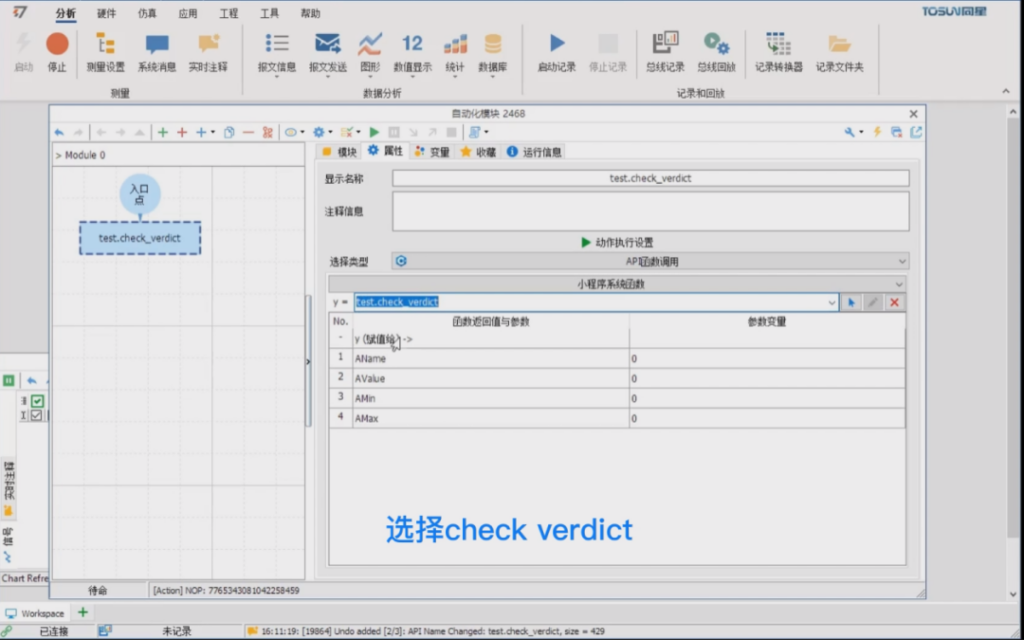
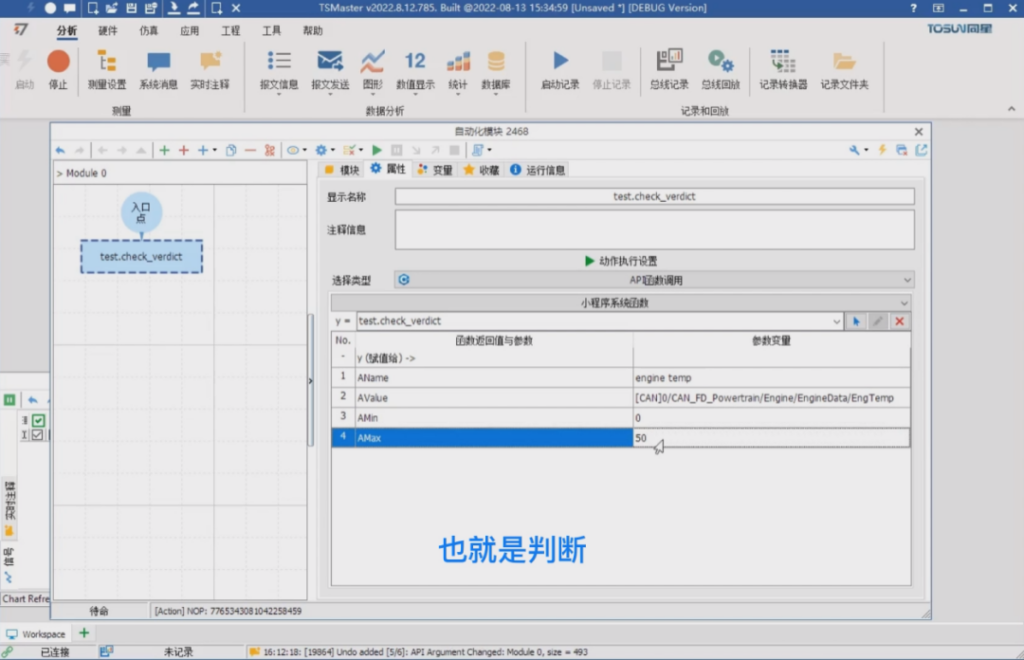
There are 4 parameters here, they are the name of the display, the real time value of the parameter, and the minimum and maximum values allowed. You can fill in the name as you like, for example, engine temp, this string will end up in this report, and for the real-time value, you need to select the temperature signal of this engine.
The two signals min and max are assigned as 0 and 50 respectively, to determine whether the signal is between 0 and 50, if yes then the test passes, if no then the test fails.
Clicking to run the program, which is currently just 0, you can see that the detection was successful. If you change this engine temp to 100 degrees and run the program again, you can see that the detection fails. Then a detection message will pop up, that is, the current temperature is equal to 100. and is not in the range of 0 to 50, then the above is the method of immediate detection in the test.
2. Signal checker's set of APIs
If the temperature of the engine is changing all the time and we need to check if the temperature is within the allowed range over a period of time. The common method is to use a loop, such as the for function in C language or the run and jump in graphic language, so that it keeps jumping back and forth, and keeps detecting in this loop. But this method is inefficient, and such logic is complicated if multiple signals need to be judged at the same time. Therefore, the direct implementation of the logic is obviously not a reasonable approach. At this point, we use a series of APIs of TSMaster's Signal checker.
2.1 add check with time
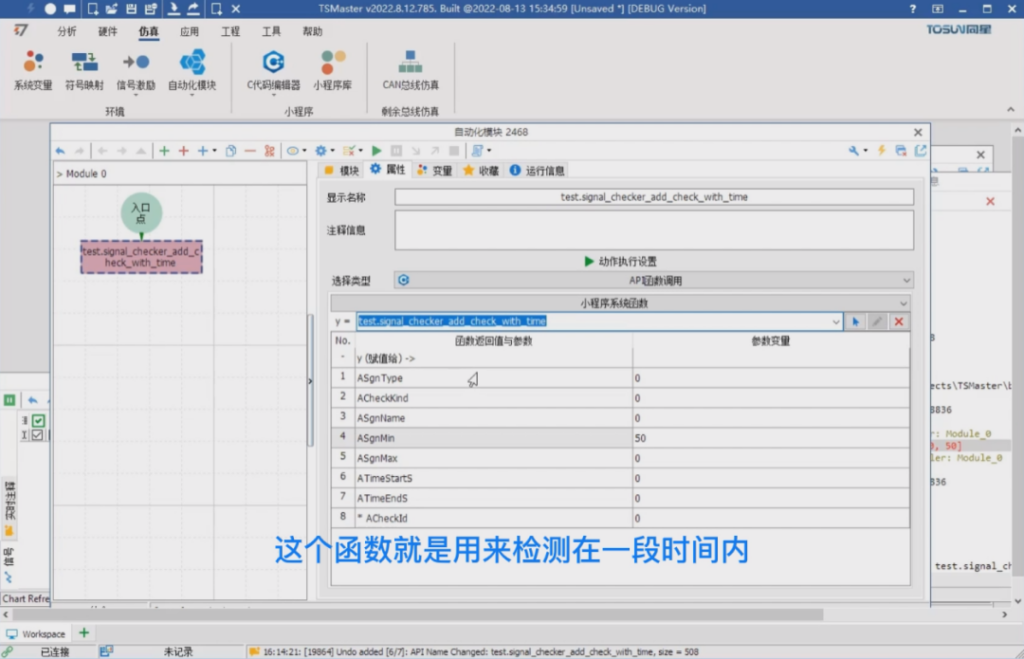
Suppose you want to detect whether the engine temperature is between 0 and 50 degrees within 0 to 15 seconds, you can use a limited time detection function, let's filter through the string checker, you can filter the signal checker's series of functions, then the first function is called add check with time. this function is used to detect whether the value of this signal is within the range in a time whether the value of this signal is within the range or not.
2.2 8 parameters
The 1st parameter is signal type, click on constants and then enter checker here, you can see that there are 3 types of signal type: can signal lin signal or system variable respectively, here we choose can signal.
The 2nd one is the type of detection. Click on the constants and filter them by the keywords of Signal checker.
The 3rd one is the statistic type, the minimum, maximum or average value of the statistic signal and so on. Choose always detect, next is the name of the signal, choose the engine signal, temperature signal engine temp. but need to pay attention to is, you need to delete the CAN prefix in front of the string, so that it is the string itself.
The 4th is the minimum value of the signal tolerance, which we set to 0. The 5th parameter is the maximum value of the signal tolerance, which is set to 50 degrees. The 6th is the detection time, which starts at 0 by default. The 7th is the detection end time, set to 15 seconds or 30 seconds longer. The 8th is the detection handle we added.
2.3 Adding detection signals
Whenever a detection module is registered, the handle of the module will be returned to our program, and our program can repeatedly read this handle to get the relevant detection results. Here we need to associate it with a local variable. We add a local variable, change it to ID, and then go back to the properties and associate it with our local variable, thus realizing the addition of a signal detection.
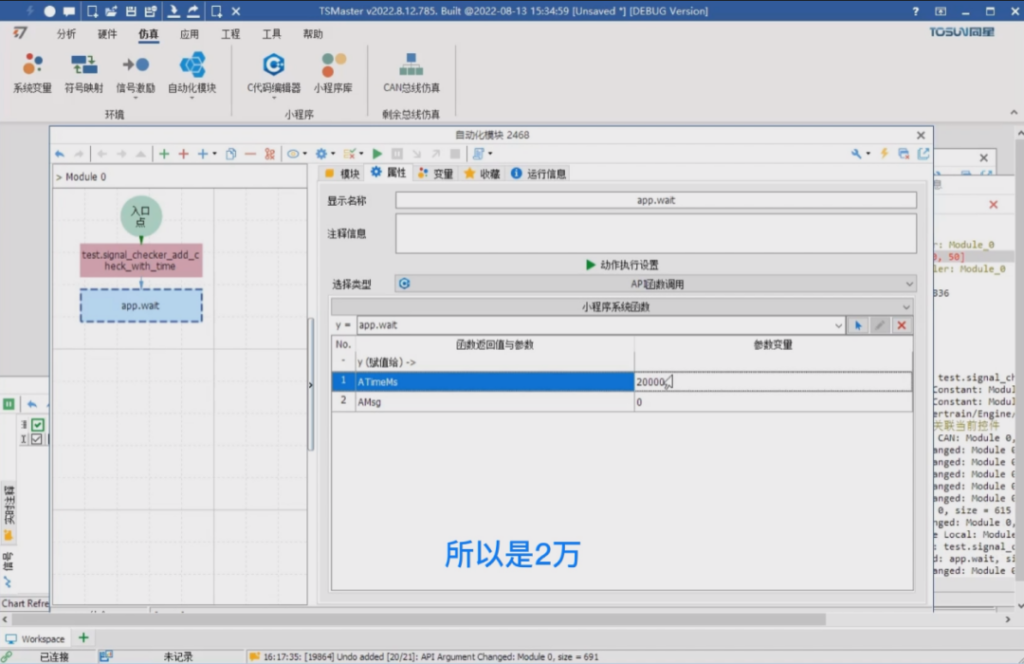
Next delay 20 seconds time, using the WAIT method, here it is milliseconds so 20,000, the message can be left out so it doesn't print.
Then take over is to get the test results, or the same API or to filter through the checker, then here you can find get result, this function has 4 parameters, CheckId is the distance we just get, we choose ID, the following 3 is the return value, we can not fill in, do not fill in means that we do not need this return value, directly discarded! We can leave them blank.
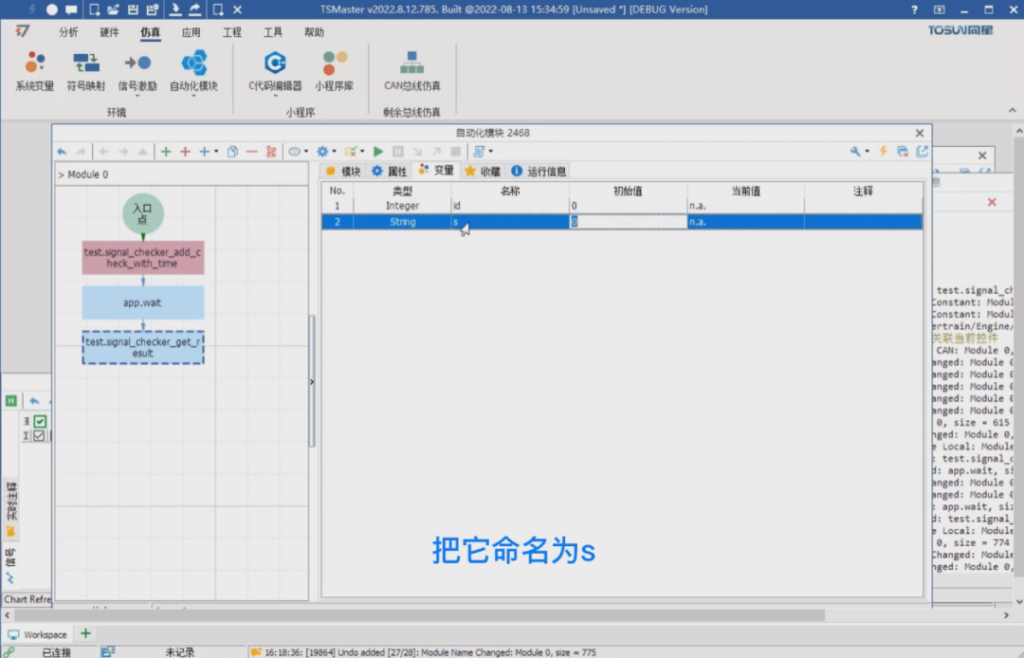
Inside the C language these values must be associated with the corresponding variables, inside the graphical programming language can be directly discarded, of course, you can see that the last one is the result of a string expression, we can save this expression as well, here we apply for a string, name it s, and then associate it in this place, and our local string implements a detection, then we can let this detection to run automatically with the start of the program.
3. Initiation of proceedings
3.1 Normal value range
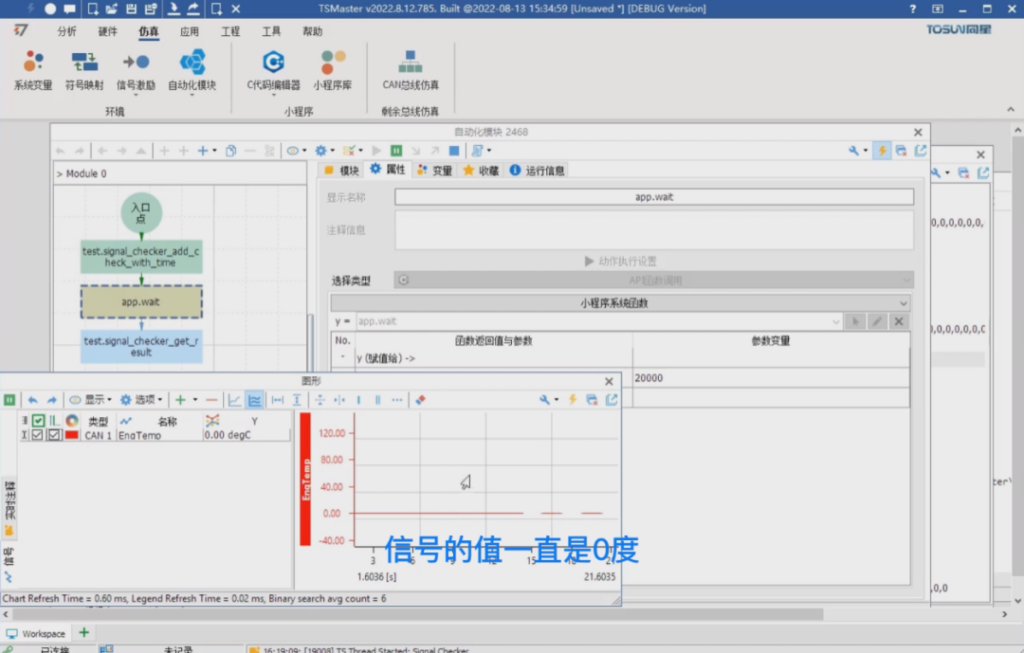
Click start, the program is running, this time the program in wait waiting process, waiting time is 20 seconds, in this process you can see the value of the signal has been 0 degrees. We can modify at will, sometimes we can enter engine temp, then this value sometimes we change to 35, then in the change, at this time the process detection is very smooth, and there is no value other than 0 to 50.
3.2 Exceeding normal values
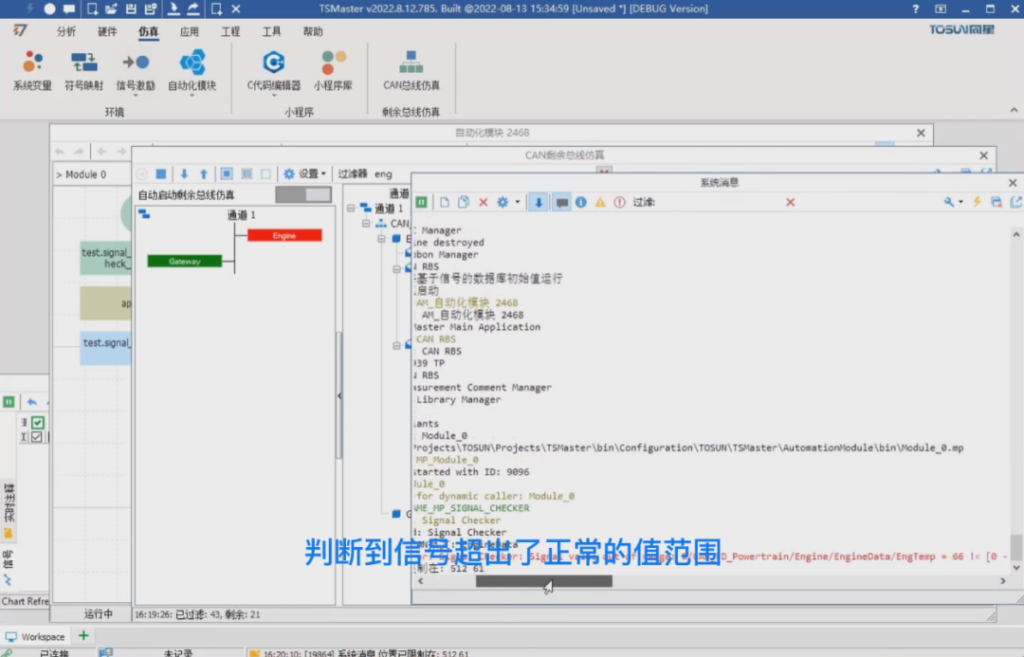
If we try to change the engine temp value directly to 66, then the instant the change is made the detection determines that the signal is out of the normal range of values, not in the range of 0 to 50, so an error message is printed. After waiting for the 20 seconds to finish, you can see that our detection function will also turn red immediately.
3.3 Testing the engine temperature
What we actually want to test is the engine speed, that is, whether the engine temperature is still within the 0-50 degree range when EngSpeed is between 3,000-5,000 RPM. This then requires the use of a judgment with a trigger.
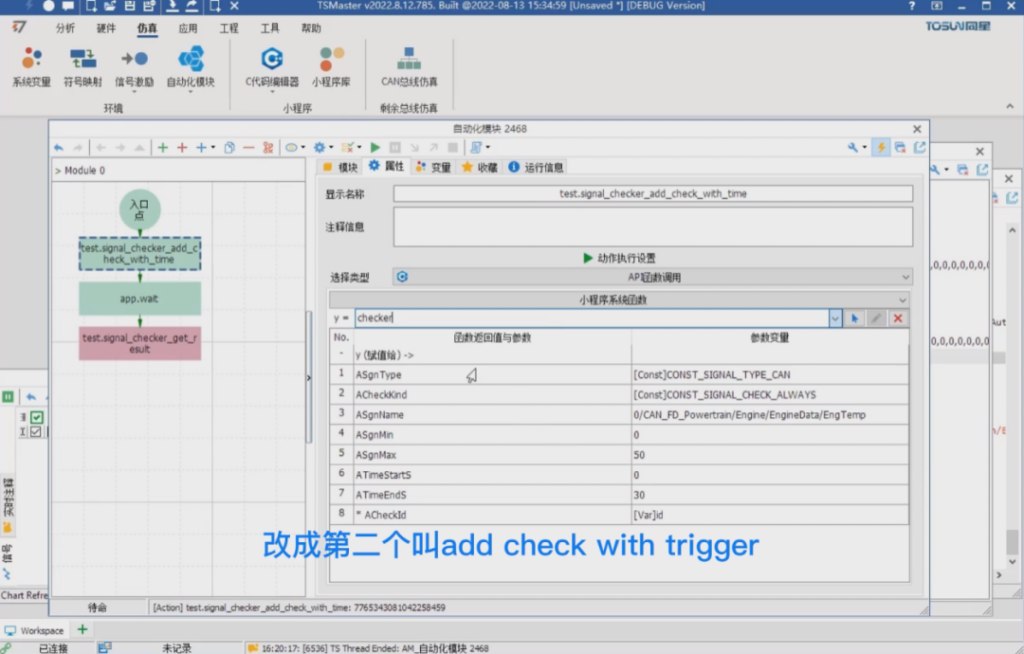
Going back to the automation module, change the API function for the first judgment to a second one called add check with trigger. this function has 10 parameters, the first 5 parameters are kept and we continue to keep its value without adjusting it. Starting with the 6th parameter, it is related to the signal that triggered this.
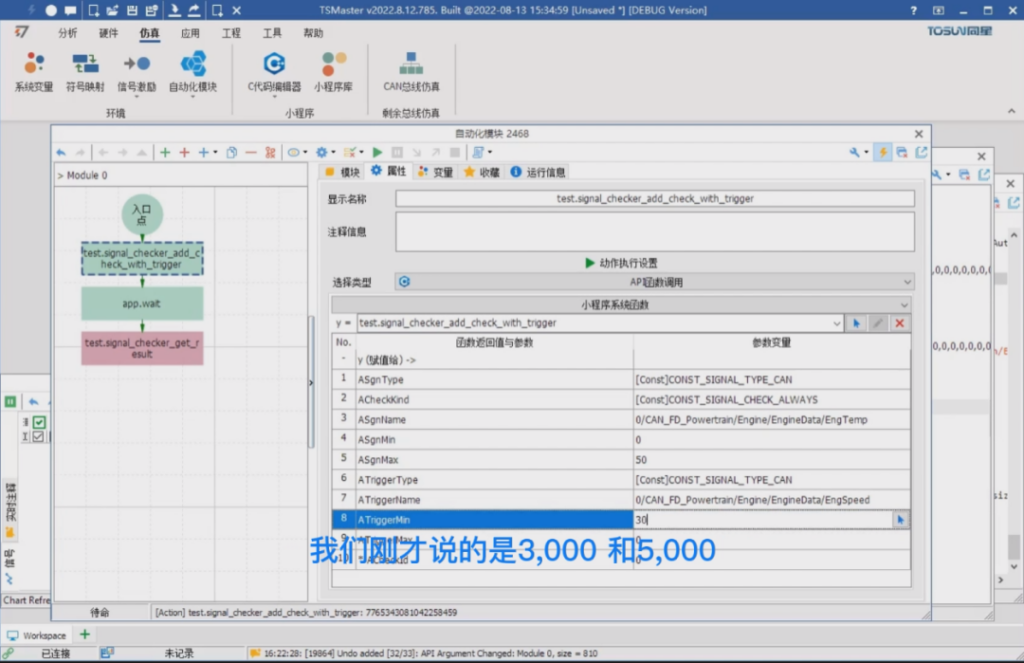
Our intent is to set it to the engine speed, so here the type of trigger is still a constant is a CAN signal type, enter TYPE_CAN here and the name of the trigger is the name of the CAN signal.
We're going to select EngSpeed here, and similarly we're still going to remove the prefix CAN to indicate that this is a string rather than a value, and then the next thing is the minimum and maximum values for the trigger. We were talking about 3,000 and 5,000 RPMs, and then finally a CheckId, associating it to our local variable, and every time it's called, the Add Judgment function adds a judgment module inside our detection engine.
It is possible to clear the judgment module of our test engine before or after the start of the test, for example before the start you can choose a function call still checker, the corresponding function is called clear, which is to clear all the detections, and then we can add a new detection. At this point we implement the detection associated with this signal, which means that the detection is only enabled if the detection condition is that our engine speed is between 3,000 and 5,000 rpm.
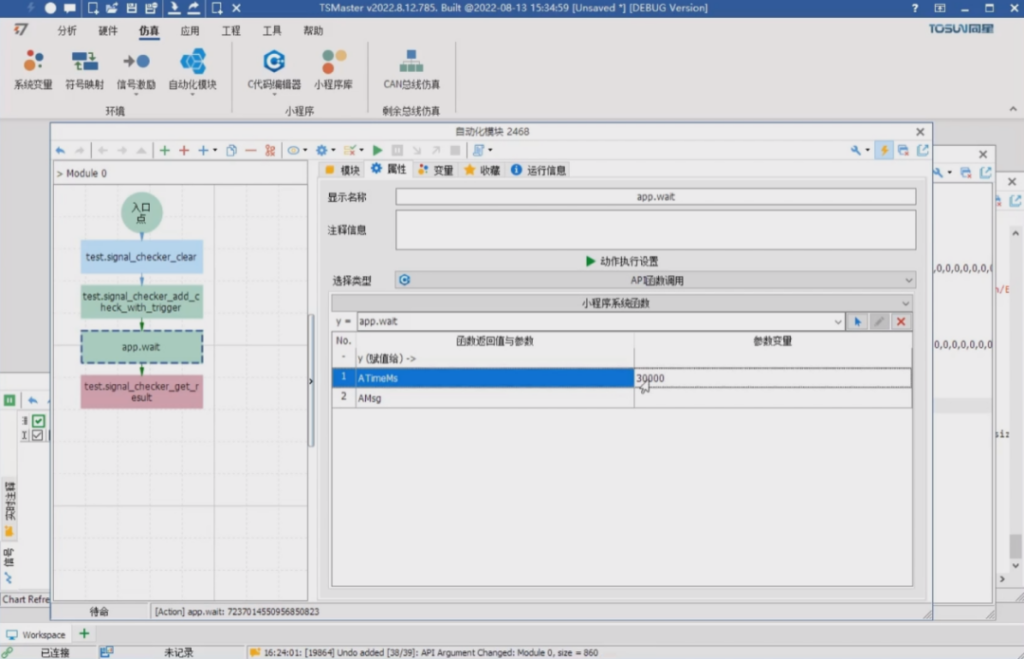
3.4 Extension of time to 30 seconds
We can lengthen this delay time, say to 30 seconds for our observation, and at this time we can start the program again and see that it is running. At this time, the engine speed is 0, so it is not in this range. We can set Temp as we like, for example, to 100, this time there is no problem. Let's change Speed to 4,000, and the test will be valid.
If we enter a value over 50 at this time, we set the engine speed to 4000 and then there is still no problem at this time.
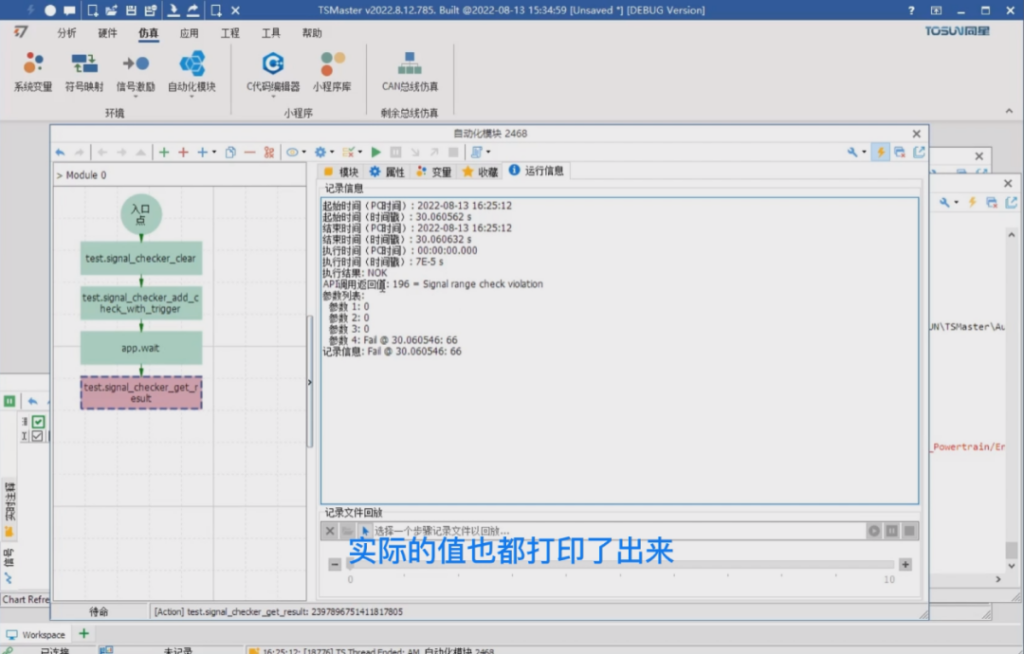
If you set the temperature to 66, the instant you set it you can see that the detection fails, it is not in the range of 0 to 50. After waiting for 30 seconds, we can see that the return value of our checker function has made a determination that the temperature value does not meet the requirements of the 0-50 range within the 3,000 to 5,000 rpm range, and the actual values are printed out.
About More
This is how to use the Signal checker API. See you in the next issue!(You can watch the video tutorials on our B-site)


