overviewPreface
Today we introduce you to the new TSMaster feature - Toolbox Design and Development. With this module, anyone is able to design professional TSMaster user interfaces in Python and integrate them into their projects.
You need to update your TSMaster software to the latest version. The download link of the latest version can be obtained by replying "TSMaster" in the menu bar of the public number.
I. Toolbox persistence
The persistence function of the toolkit
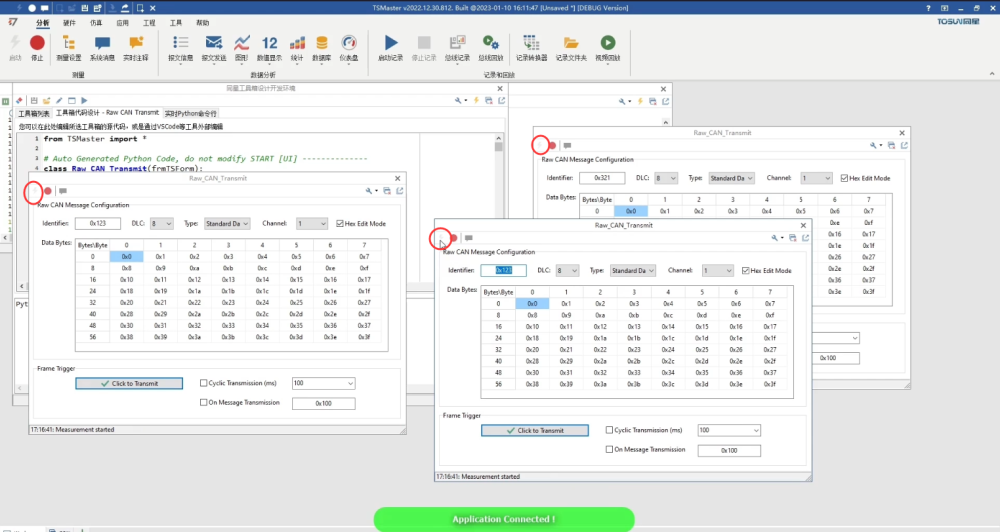
Open TSMaster, enter it and switch to the application, click on the icon for Toolbox Design Development Environment and the screen for the development environment will appear. At the same time there will be a new icon and the TSMaster Toolbox appears to the right of that icon. This icon is used to link to the user design generated interface. Forwarding to the development environment interface, you can see that there are two ready-made toolboxes, one is the sending window for CAN messages and the other is the toolbox design guide.
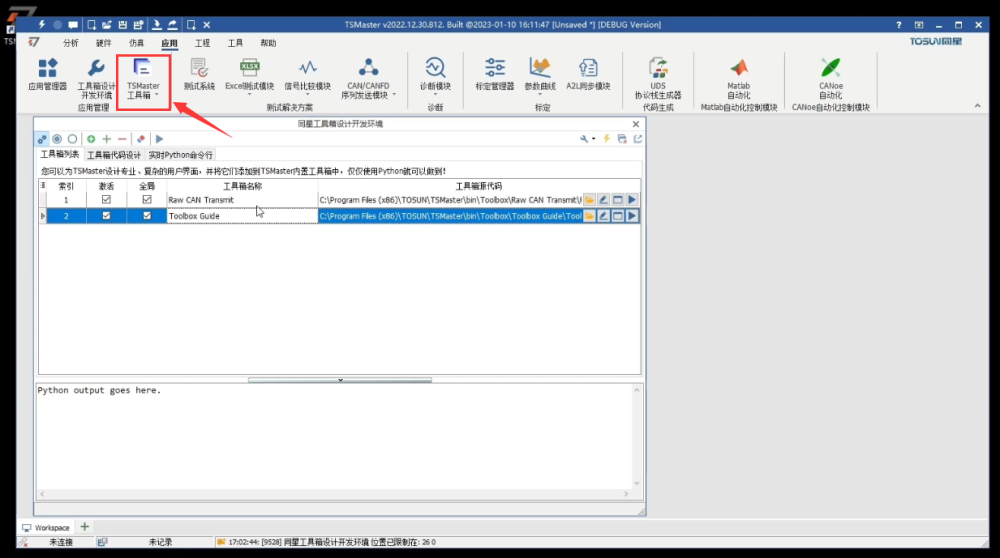
Then click on the Run button on the far right of the corresponding toolbox and the window will be displayed below the link to the TSMaster toolbox, we drag and zoom this window. If you click on Close in the upper right corner, the default action is to hide it, if you want to restore this window you can retrieve it by scrolling down, and if you click on the Delete button in the upper right corner, you can permanently delete the window. Such a window creates a new one every time you click on it, and each window has a separate configuration.
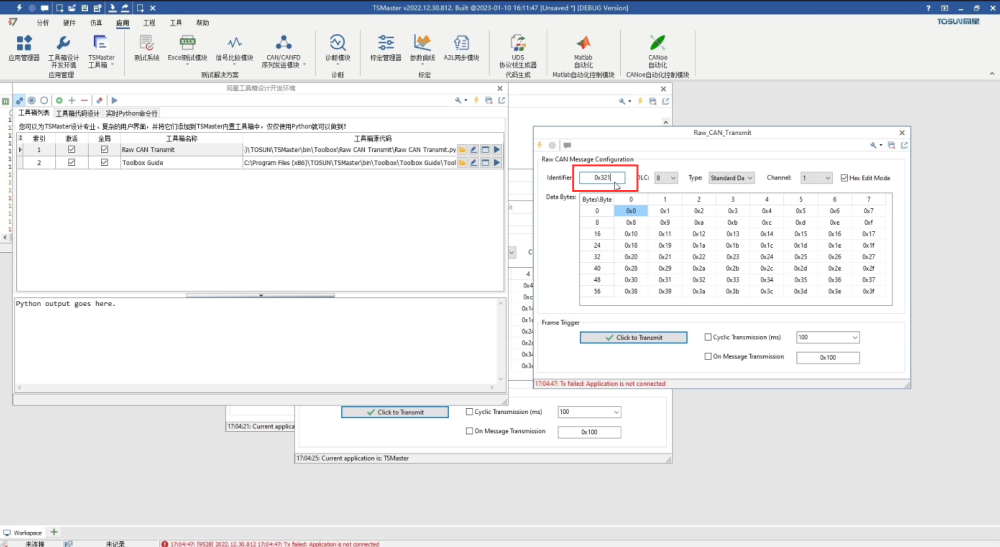
We can try to modify this configuration, for example, change 0x123 to 0x321, at the same time we will arrange the windows a little bit, create a new page, pull out one to two of the windows, save the project, close TSMaster, and then open TSMaster again, select the last project, and then open it, you can see the window of the toolbox, and the layout is still the same as the last time you closed the The layout is still the same as before the last closure. For example, the ID of the window on the left is 0x321 which we have changed, and the window on the right is 0x123 by default, which is the persistence function of the toolbox.
II. Python's Syntax Hints Function
Python syntax prompt
In the development environment, selecting a toolbox and double-clicking on the corresponding line brings you to the code editing window, where all the visual elements of the toolbox and all the logic running behind it are inside this Python code. If you want to open this Python file with the system-associated Python file editor, just click the Edit button on the toolbar.
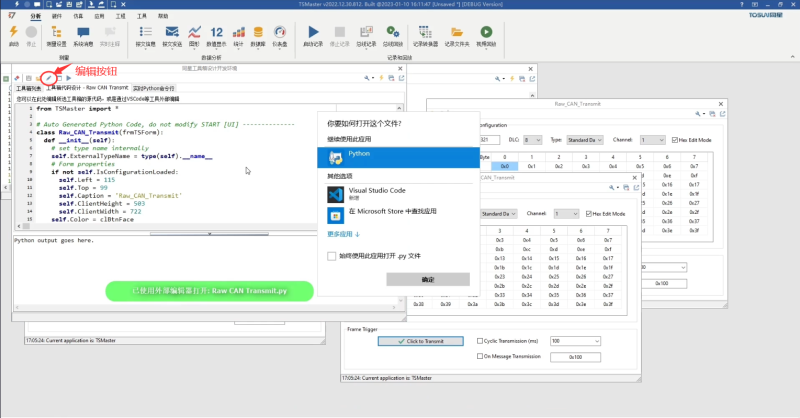
For example, on this machine, Visual Studio Code is used to associate the Python file, then what is opened is Visual Studio Code, and after opening it for the first time is the need to install the Python support package. In VS code, you can search for Python here, and you will see the Python support packages released by Microsoft, click Install. Once installed, you can easily modify and manage your code.
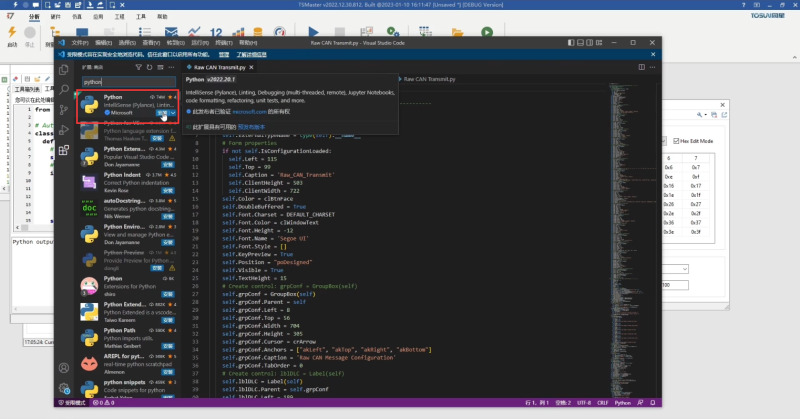
After the installation is complete, close the extension's interface and go to our current Python environment. The default Python environment will take the path of the Python already installed on the computer. This path may not contain our TSMaster engine, so we need to switch the Python environment. If there is no TSMaster package, the syntax hints will show a lot of errors, so we need to switch to the default Python version of the TSMaster installation directory of Python, the current Python environment already has the syntax hints function.
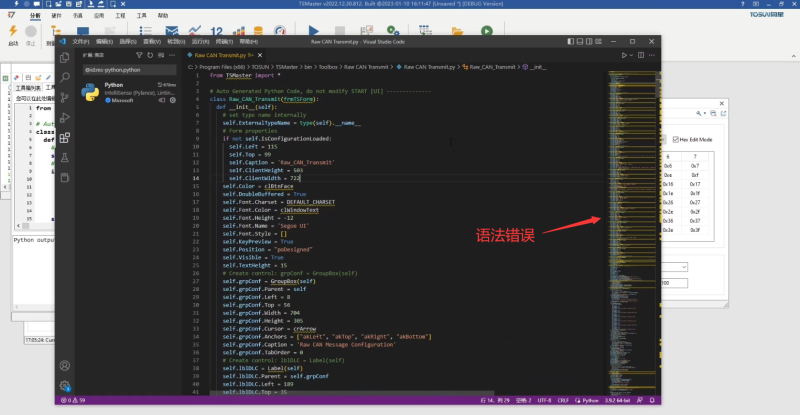
Press Ctrl+k+0 to collapse the code, let's take a general look at the code, the file has only three parts, the first one is the import-import TSMaster, which is the type information in the TSMaster support package; the second one is the definition of the form class, which inherits from the TSForm inside TSMaster; and the third one is the main function, which is used to create and start the program that detaches from the TSMaster; the third is the main function, which is used to create and start a separate program from TSMaster. Next we focus on the second part of the form class code.
Third, the form class code
Form class code
The first is the init function and the second is a variety of user-defined functions. If we expand the init function, we will find a lot of interface related code inside. For example, the DLC Label box, go to TSMaster, then find the VS code corresponding to the code to create the code, which sets the position of the Label box is the Left Top Width Height attribute, as well as its caption attribute, these codes can be handwritten by the user, or through the form design tools provided by TSMaster to automatically generated.
Let's scroll down to the bottom half of the init function, which is underneath Auto Generated Python Code, where the user initialization code is stored. We can create and set up the upper space to further set the behavior of the space. For example, line 247 creates a toolbar button for connecting to the application, and after this button is created, we associate its OnClick event to our local callback function called OnConnectClick, and then jump to this function to expand it, and the logic of its execution is that it first substitutes for TSMaster's API, which is the app. app.connect to connect to the application, if the connection is successful, that is the return value of 0.
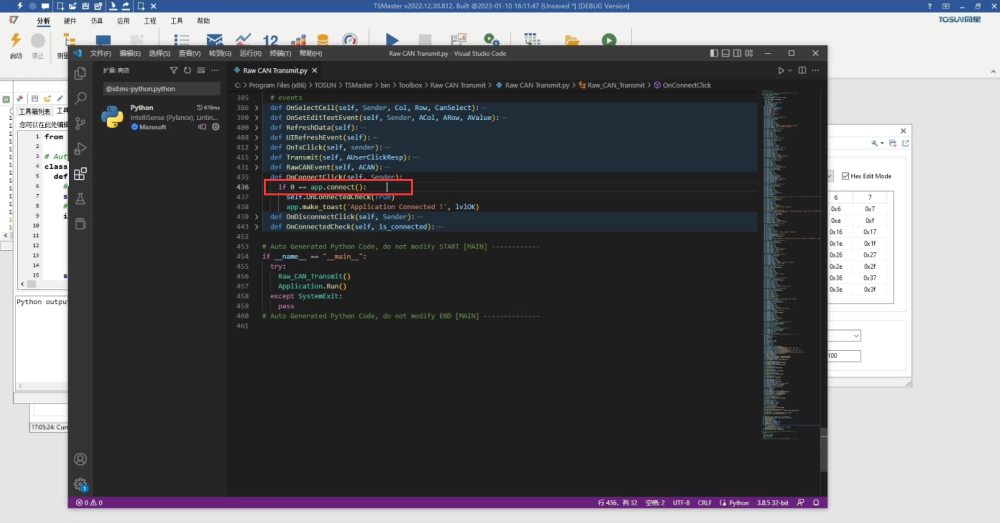
We can go back to the TSMaster software to verify this, find a window, click the connect button on the toolbox, you will see a successful connection. All the toolbox form's connect button is grayed out, while the disconnect button is active, which is the role of the TSMaster event callback function.
Go back to the code and look for the OnMeasurementStart function, which calls a sub-function to set the state of the button, hold down Ctrl to enter this function and expand it to look at it, then the logic of this function is that if the connection is successful, the Connect button is grayed out, the Disconnect button is active, and at the same time, it prints in the status bar of the form that the application is connected. Otherwise, it says that the connection is disconnected. So whenever we click on Connect, it will say Measurement started and when we click on Disconnect, it will say Measurement stopped.
As for the willingness to click on the callback function, since there is a Measurement start callback function on the form, we can assign it, it's this line called self.OnMeasurementStarted Event, and we can assign it to our internal OnMeasurementStart callback function. This way, whenever TSMaster successfully starts a connection, it can start a connection anywhere.
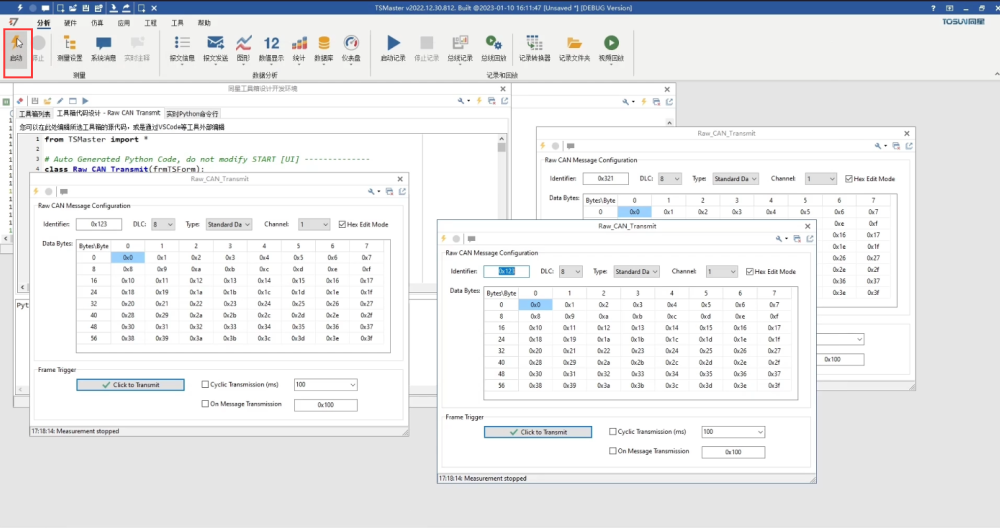
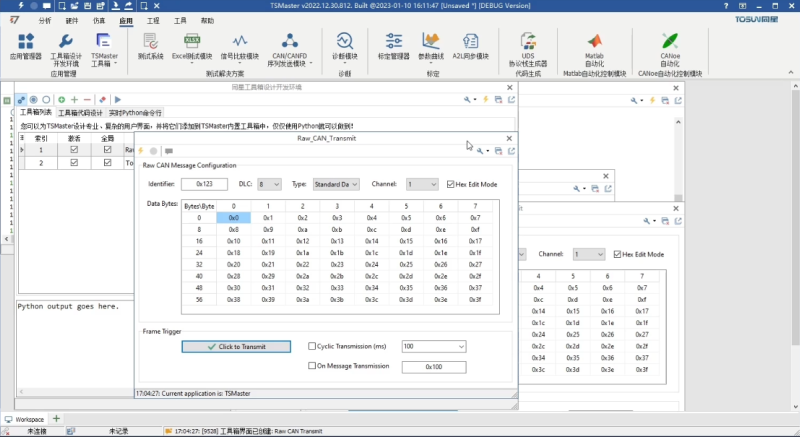
If we click TSMaster to start the connection, we can see that the status of the buttons on the toolbar have changed synchronously. The Raw_CAN_Transmit window we saw before is a complete demo, which implements a primitive CAN message sending logic, that is, clicking a button to send, or sending on a timer, or sending on a trigger after receiving a specific message. The TSMaster Toolkit IDE series will be updated with new features in the future, so stay tuned...
About More
For more tutorials on how to use it, check out the B-site video~


