软件更新 | 从仿真到测试,全面进化!TSMaster 2026.02版六大新功能深度解读
Q&A系列 | TSMaster图形窗口如何添加自定义信号解析报文
Q&A系列 | 记录功能开启失败?可能是 BLF 文件路径惹的祸!
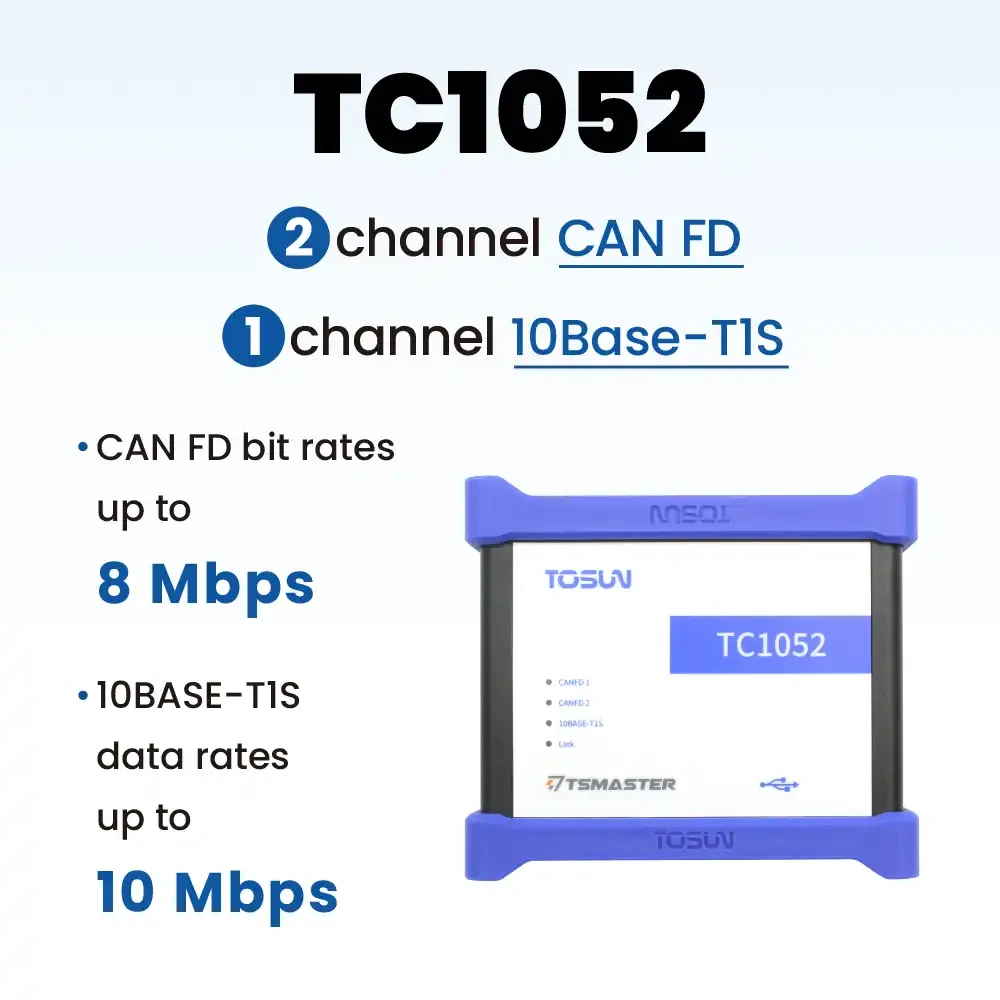
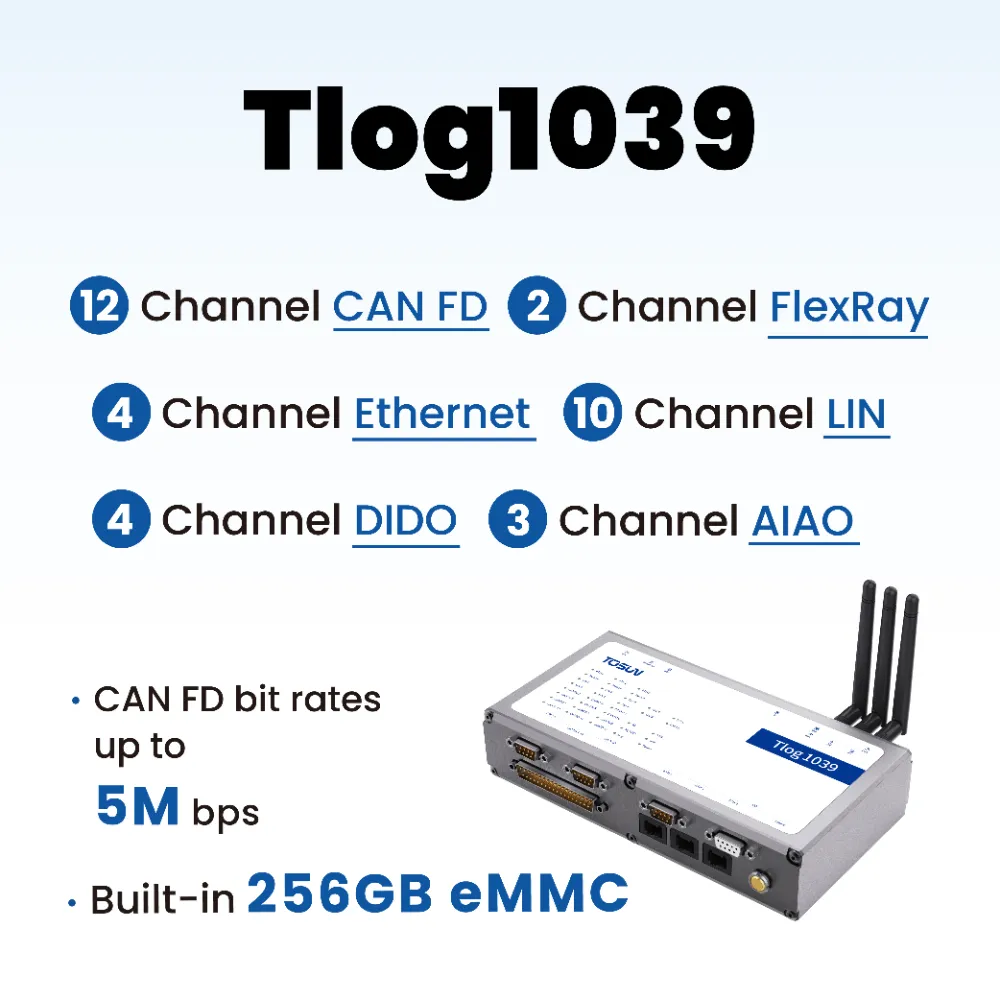
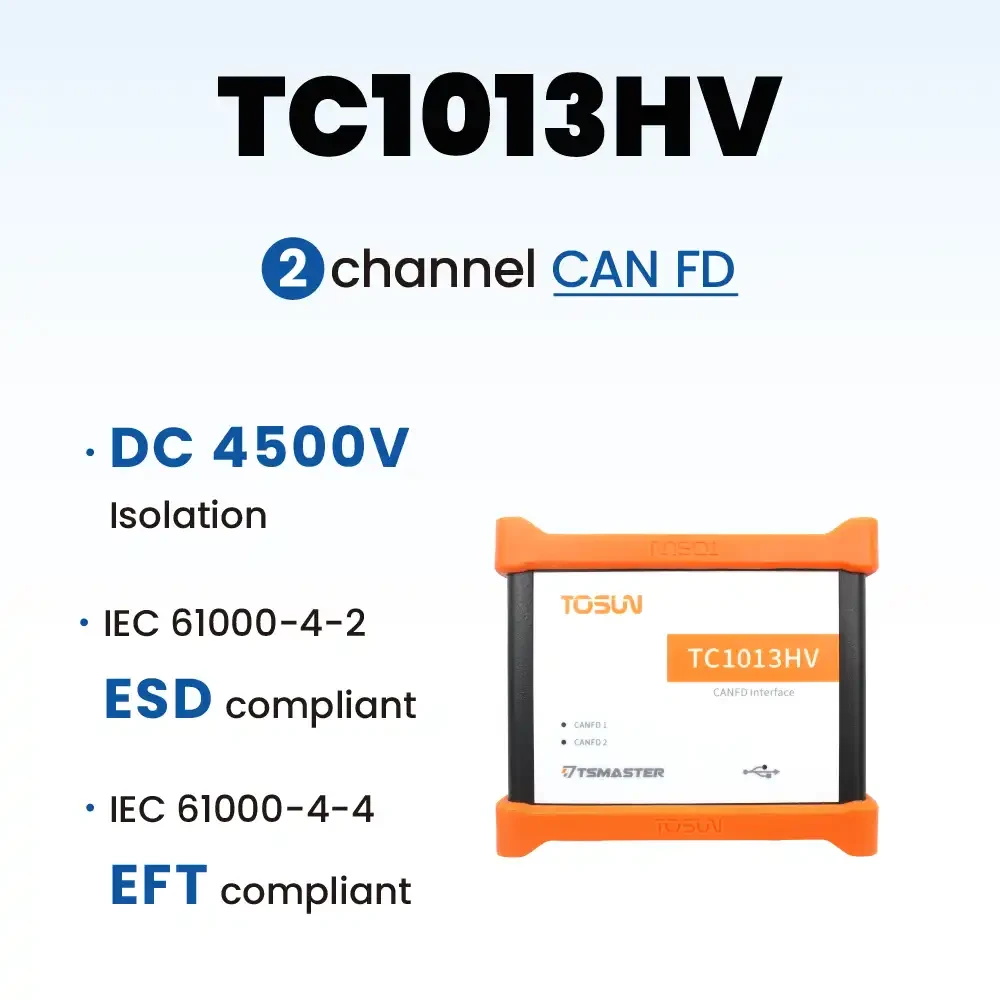
新品发布 | GW2208/GW2212:基于以太网通讯的高性能 CAN/CAN FD 智能网关设备
展会回顾 | 同星智能韩国测试展精彩收官,下一站德国再相约!
展会动态 | 下周见!同星智能四展联动,从首尔到上海密集亮相
特点
1)均采用主从的模式,单个主机可以同时与多个从机通讯。
2)主机通过下发命令与从机建立连接,解锁,读取数据,修改参数等操作。
XCP/CCP协议,配合A2L文件,可以直接在软件上更改某些参数,执行器就会给相应的反馈。TSMaster 标定模块依赖如下两类文件和运行 XCP 或 CCP 协议栈的ECU。
1、支持其他语言进行二次开发,本例使用C# 调用TSMaster API实现标定功能,使用软件为Visual Studio 2019。
创建一个新工程,步骤如下:选择C# -> Windows窗体应用 ->点击下一步。
5、添加TSCalibration类
点击添加 -> 类,修改名称 –>添加(A).成功创建TSCalibration 类。
Q&A系列 | 导入 DBC 文件后信号注释乱码?原因在这儿!
您必须 在内发布评论。
产品入口: 产品添加到购物车