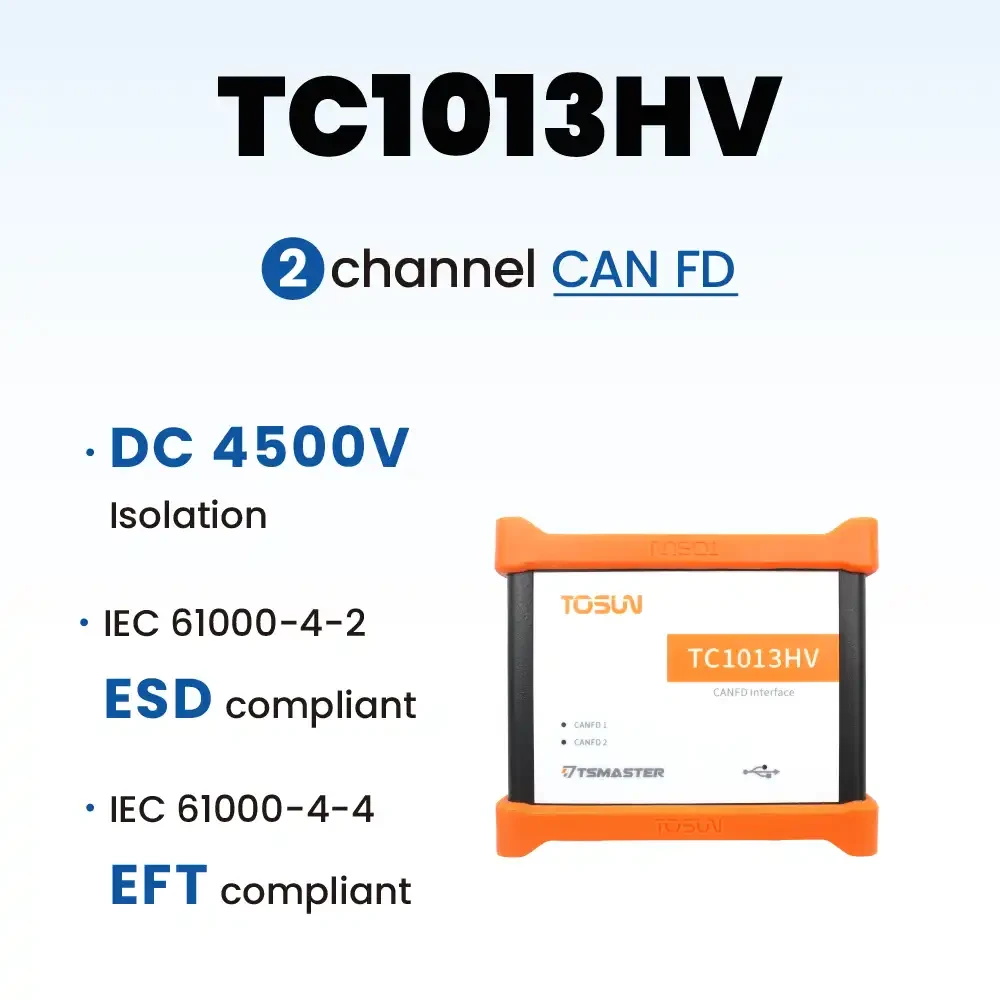
You are currently viewing 新功能发布 | TSMaster工具箱集成开发环境系列3-工具箱调用小程序库

New Releases | TSMaster Toolkit IDE Series 3-Toolkit Calling Applet Library

overviewPreface

Today continues the third chapter of the TSMaster Toolbox series on how to call your own written API functions with Python scripts.

I. Installation of small program library

Install the applet library

Open TSMaster, drag in a dbc file, you can go to the installation directory of TSMaster to find this file, find any one in Demo-Databases, for example, CAN_FD_Powertrain, drag it in and then you can close this database interface.

Next, select the hardware channel, 1 CAN, followed by opening the bus simulation, also known as rbs, interface and double clicking to activate the Engine node. When the remaining bus is activated, the Engine node sends out its cycle messages.

Switch to the Custom Functions group, right-click to add a custom function with the name set to control_rbs. The parameters of the function can be set slightly more complex, for example, the first parameter is an activation flag, which is const bool AEnable; the second parameter is additional information, for example, const pchar AInfo, so that the function's interface to the defined, the next realization of this function.

First of all, you can print out, the user wants to see the information, that is, log(AInfo), next determine the Enable flag, if(AEnable), if it is Enable then write com.can_rbs_start, otherwise it is stop, so that the API is done. In order for other programs to use this function, you need to install the controller applet into TSMaster as an applet library. Switch to the properties page and click on the applet library switch, first compile and then install and you are done. At this point you can call this API from anywhere in TSMaster.

II. Automated testing

Automated Testing

Applet library, there is controller, an mp applet, which has an API function. How to verify it? You can open an automation module, select the entry point, enter, and then double-click the NOP, to the right, modify the type of API calls, and then modify the function call type for the small program library function, at this time, a function selector will pop up, the first function is the control_rbs that we have just designed. select the function and double-click it, and then fill in the right side of the parameter, the first one is to make it so that the flag, fill in true or 1 can be, the second is the need to print information, such as start from automation module, and then press F9 to start, will pop up a prompt message.

Inside the message is first the printed string, start from automation module, followed by an error message indicating that the application must be connected before the simulation engine can be activated, i.e. by clicking on the start button in the upper left corner. Follow the instructions to connect the application so that the simulation engine is ready to run.

Cut to the automation module again, press F9, the program immediately executed successfully. Cut to the trace window, you can see the message from the Engine node, then go back to the automation module, select the command control_rbs, paste an identical function call, change the new function call to disable rbs, that is, fill in false here, fill in the information in the stop from automation module, and then press F9 again, the Engine node has been disabled. Since the last executed step was a forbidden operation, the trace window is no longer refreshed and the Engine node has been forbidden. Since the bus simulation has stopped, the test of the automation module is now finished.

III. Launch form design

Launch form design

Open the main interface of the toolbox, add a new toolbox, click the "+" button on the toolbar, enter the name of the new toolbox: test, press enter, the toolbox is created. Note that the toolbox, by default, is located in the path of the current project folder, it will follow the current project to go, the table, the global column of the hook is unchecked state. Click on the folder button on the right to see our toolbox. It is indeed located in the path of the current project, which means that when a new project is created or another project is loaded, the toolbox will not be found.

If you want to create a permanent toolbox that can be used by every project, you need to enable global toolbox mode. Click on the gear button in the upper left corner and place the mouse over it to prompt to activate either Project Mode or Global Mode, then by default it will be checked, indicating that Project Mode is active, and clicking it again will activate Global Mode. When you create a toolbox, the toolbox will be placed in the TSMaster installation directory and will not follow the project.

Let's do it, click the New button, type global1, enter, you can see the new toolbox row in the table behind the position, and the global tick, is selected. Open the folder, up one level, you can also see the folder where the toolbox is located, as well as the system comes with two examples of the toolbox. One is a guide to using the control, and the other is the original CAN message sending window. Next, go to the interface design section, select the test toolbox, double-click on it, go to the code design page, and click on the form button on the toolbar to start the form designer.

Add two buttons in the interface, one to start rbs and one to disable rbs, select Button1, press F11 to switch to the property page, filter input name, change the name to btnStart, and the caption to Start, select Button2, change the caption to Stop, and change the name to btnStop, to this point End of form design.

IV. Writing event code for buttons

Write event code for the button

Add import, before adding, first of all, go to the applet module page, right-click in the blank space to add a module, select controller applet library, this step makes the API of our controller applet is visible for Python. Then go back to the toolbox code design interface, come to the second line of the code, right click, select Insert Module import, and then select our controller, you can see that the controller has been imported.

In order to get a better programming experience, you can use VS Code, click the Edit button on the toolbar, open VS Code, then come to the end of the UI creation, that is, located in the init function in the lower part of the first to add the two buttons to the click event, press four spaces to enter the def on_start_click, in the function call the The first line of code that pops up is our API, press enter. Hit the left bracket again, you can see two parameter prompts, the first fill in True, the second fill in a random string, such as start from Python, enter. Add another function def on stop_click, again controller.control_rbs is disabled at this point so it's false and the content is stop from Python.

Next associated with two events, that is, self.btnStart.OnClick = on_start_click, self.btnStop.OnClick = on_stop_click, the program is written, Ctrl + S to save. Cut back to TSMaster again, click the blank space of the code, you can see that the code has been refreshed to the latest state. Press F9 to start, and finally click the Start button, of course, before clicking the first to connect the application, and then click Start, you can see that the messages from the Engine node are appearing, and then click the Stop button, and the messages from the Engine node will stop sending. When you open the system message, you can see the messages we just printed-start from Python and stop from Python.

In this chapter, we can learn that the existing APIs of applets can be easily called by Python programs, which greatly enriches our Python's function library.

About More

Above is this chapter for you to introduce the TSMaster toolkit call small program library process, more use of tutorials can be viewed on the B station video ~!

发表回复